
In this document
- How it works
- Your emails
- Creating an email
- Customising your email
- Email footers
- Going live
- Adding the email to your email platform
How it works
- Create an email: pick a template, choose its sections, languages and assets, and give it a name. It's saved as a Draft.
- Customise its look: add your logo, choose fonts and colours, and check the preview in every language and asset.
- Submit it. Our team switches it on and it becomes Active.
- Get the email code and paste it into your email platform (Mailchimp, HubSpot, Salesforce Marketing Cloud, your CRM, etc.).
- From then on, the content of the email updates automatically, so every send shows recent market data. You don't need to paste the code again.
Your emails
Open Dynamic Emails in the top menu. This page lists every email you have created.
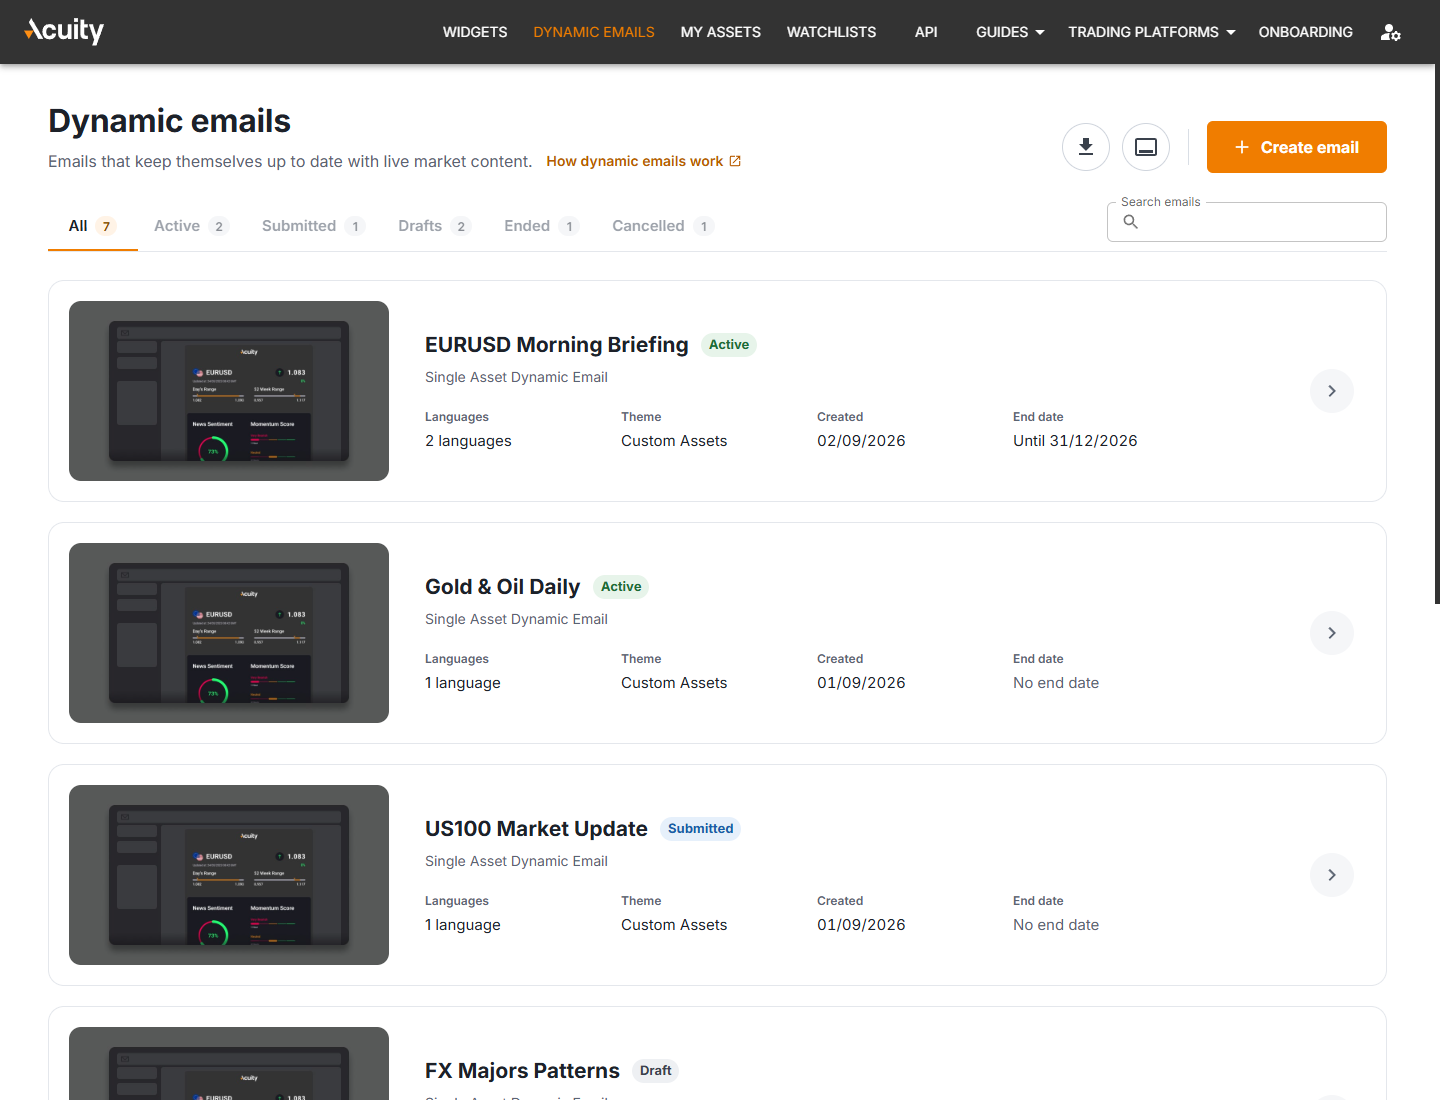
Each card shows the email's name, status, template, number of languages, creation date and end date. Click a card to open the email.
Use the tabs (All, Active, Submitted, Drafts, Ended, Cancelled) to filter the list, or type in Search emails to find an email by name.
Email statuses
| Status | What it means |
|---|---|
| Draft | You're still working on the email. Everything can be changed. |
| Submitted | You've submitted the email. It starts updating as soon as it goes live. |
| Active | The email is live and updates automatically. You can get its code. |
| Ended | The email reached its end date and no longer updates. You can extend it at any time. |
| Cancelled | The email was cancelled and no longer updates. You can resubmit it to bring it back. |
Download HTML and Footers
The two round buttons next to Create email give you quick access to:
- Download HTML (download icon) – get every active email as HTML in one zip file, with the footer of your choice. See Download all your active emails at once.
- Footers (footer icon) – create and translate the disclaimers and legal text shown at the bottom of your emails. See Email footers.
Creating an email
Click Create email. The editor guides you through a few steps. You can move back and forth with Back and Next, or click a completed step at the top to return to it. If something is missing, the hint next to Next tells you what to do.
Template
Choose the kind of email you want to send.
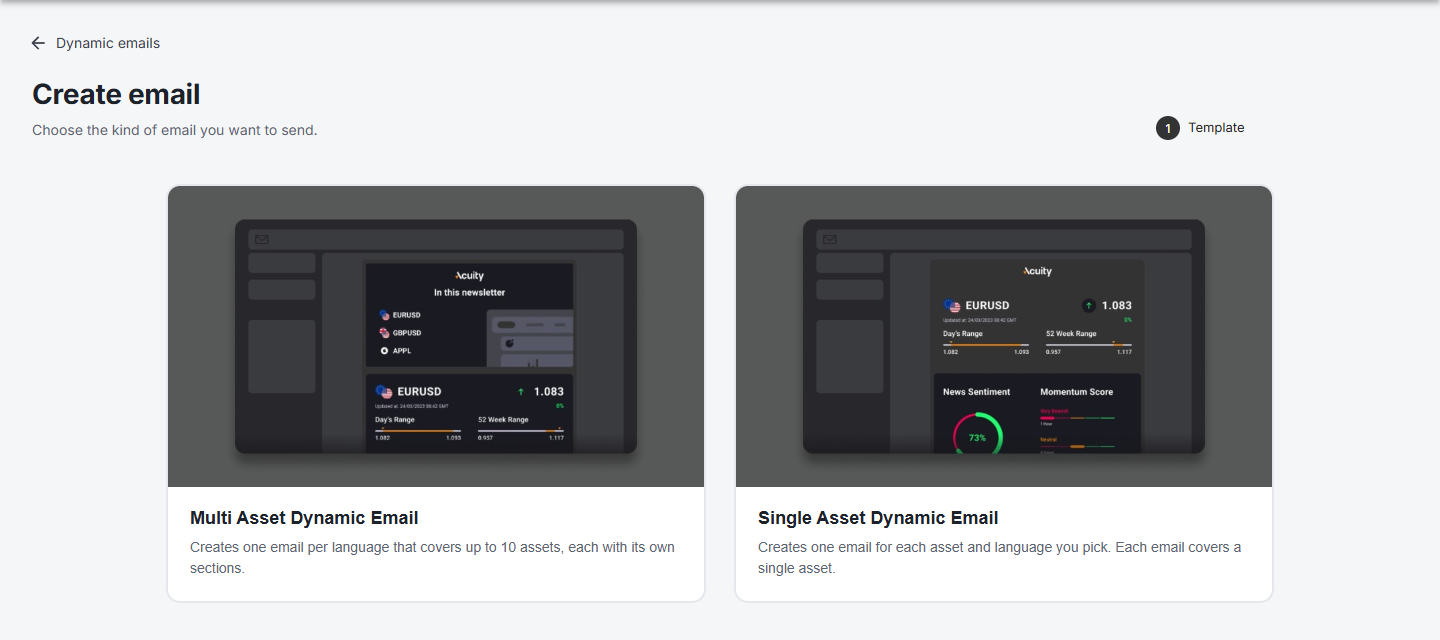
- Single Asset Dynamic Email – creates one email for each asset and language you pick. Each email covers a single asset, for example EURUSD.
- Multi Asset Dynamic Email – creates one email per language that covers up to 10 assets, each with its own sections. For example, a weekly email covering EURUSD, GBPUSD, USDJPY and Gold.
The order of the next steps depends on the template:
- Single Asset: Template → Sections → Languages → Assets → Details
- Multi Asset: Template → Assets → Sections → Languages → Details
Sections
Choose what goes into your email, and in which order. The Preview on the right updates as you make changes.
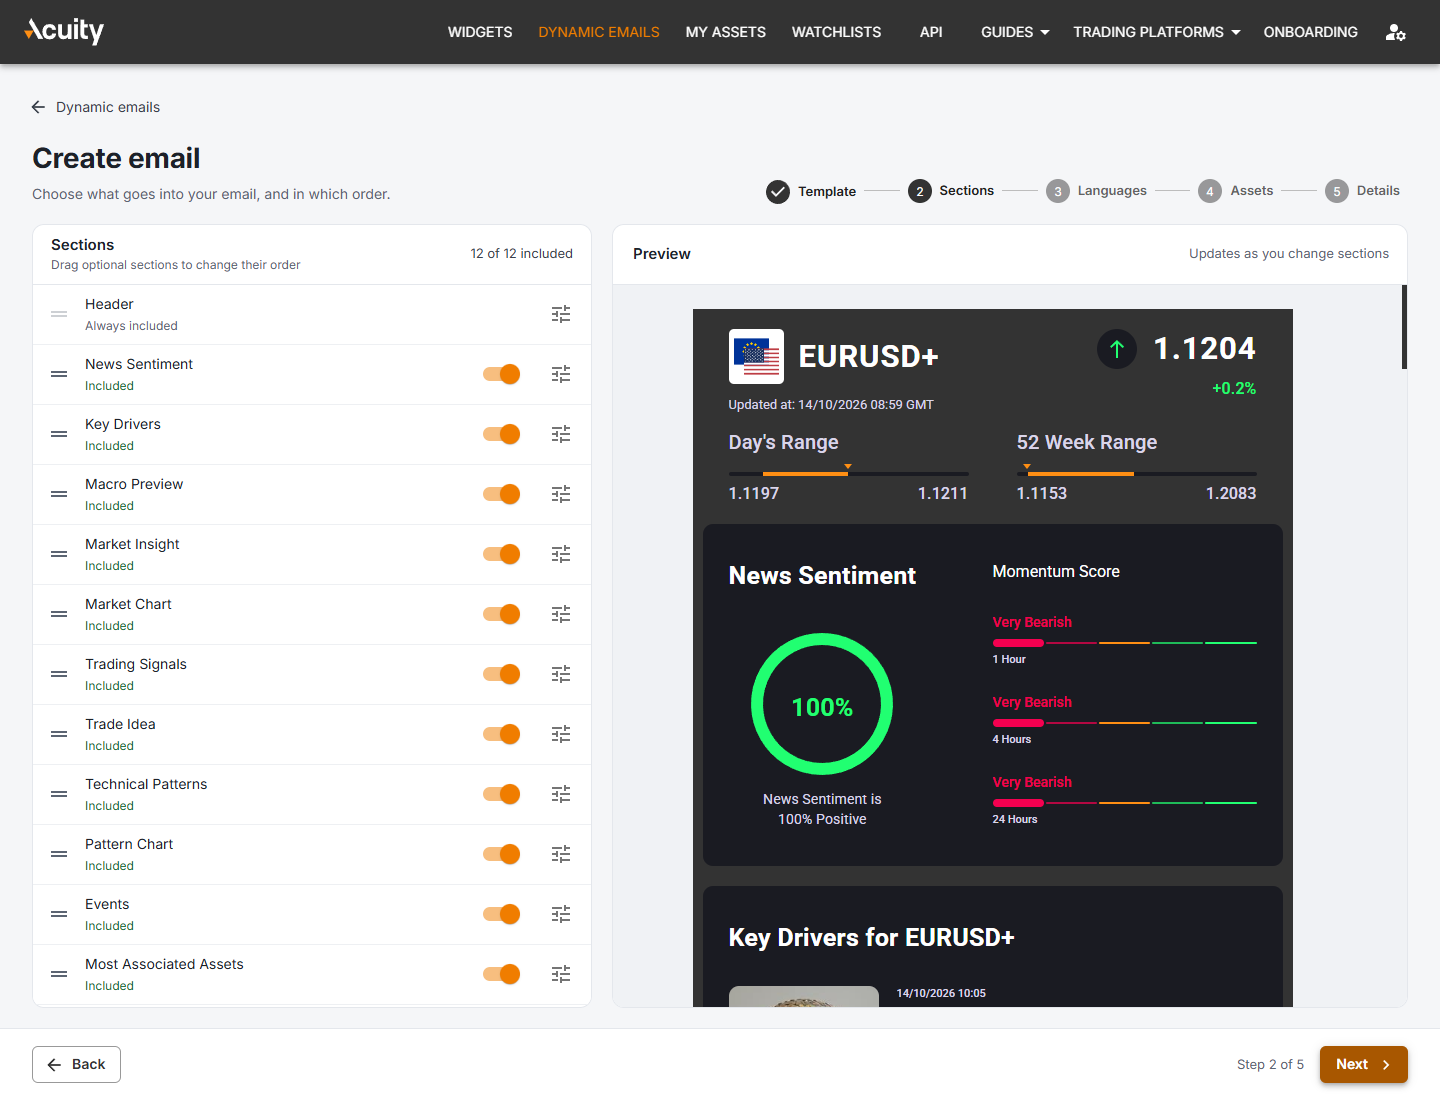
Dynamic emails can include the following sections:
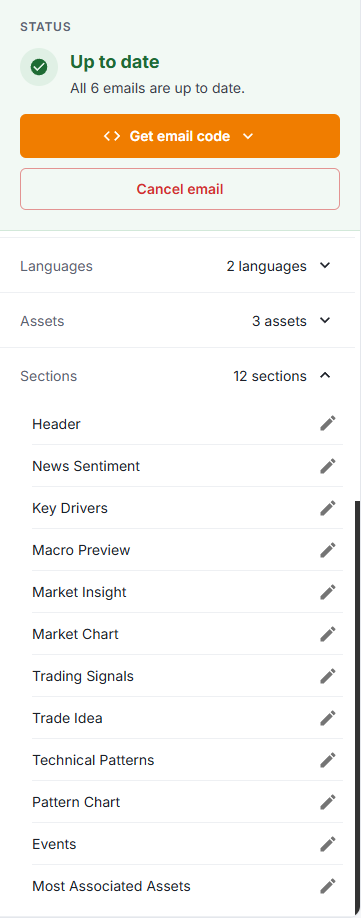
- Header (always included)
- News Sentiment
- Key Drivers
- Macro Preview
- Market Insight
- Market Chart
- Trading Signals
- Trade Idea
- Technical Patterns
- Pattern Chart
- Events
- Most Associated Assets
The sections available to you depend on the content included in your contract.
For each section you can:
- Include or leave it out – use the switch on the right. The Header is always included.
- Change its position – drag the section by the handle on the left. The Header always stays at the top.
- Change its settings – click the settings icon to open the section settings.
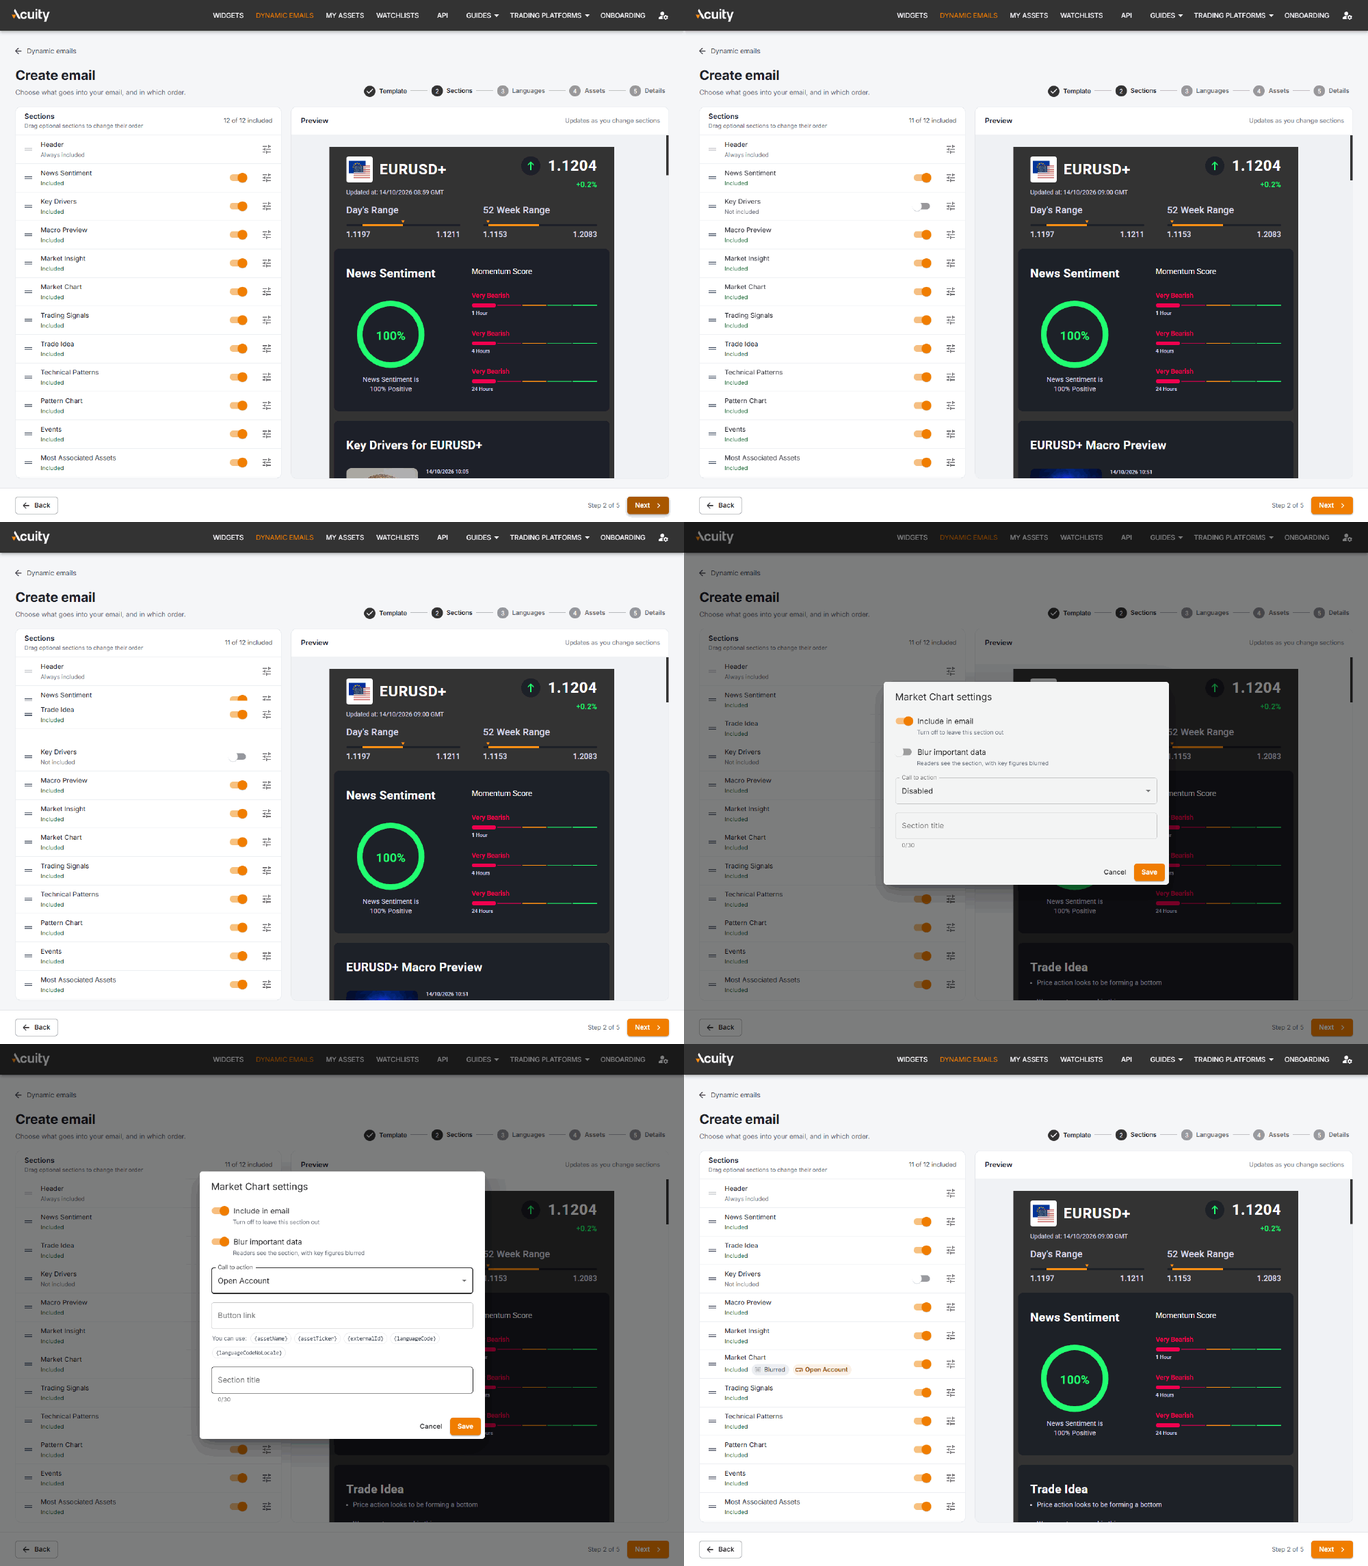
Section settings
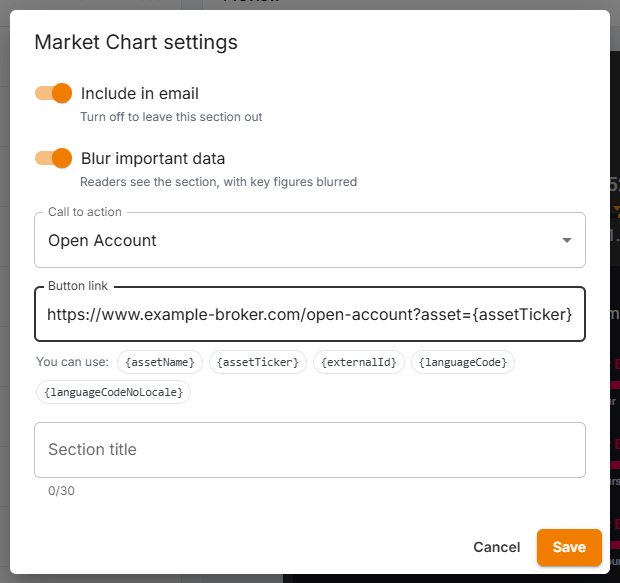
- Blur important data – readers see the section, but its key figures are blurred. This is useful to encourage readers to take an action, such as opening or funding an account.
- Call to action – adds a button under the section. Choose Trade Now, Open Account or Custom (your own text, up to 30 characters), and enter the Button link readers are taken to when they click it. You can personalise the link with these placeholders, which are replaced automatically in every email:
{assetName}– the asset's name{assetTicker}– the asset's ticker{externalId}– the asset's ID on your platform{languageCode}– the email's language, for exampleen-GB{languageCodeNoLocale}– the email's language without the region, for exampleen- Section title – replace the default title of the section with your own (up to 30 characters). Available for most sections.
Note: if a section has no content for a particular asset at the moment, it's left out of that email until content becomes available. The preview shows a note when this happens.
Sections in a Multi Asset email
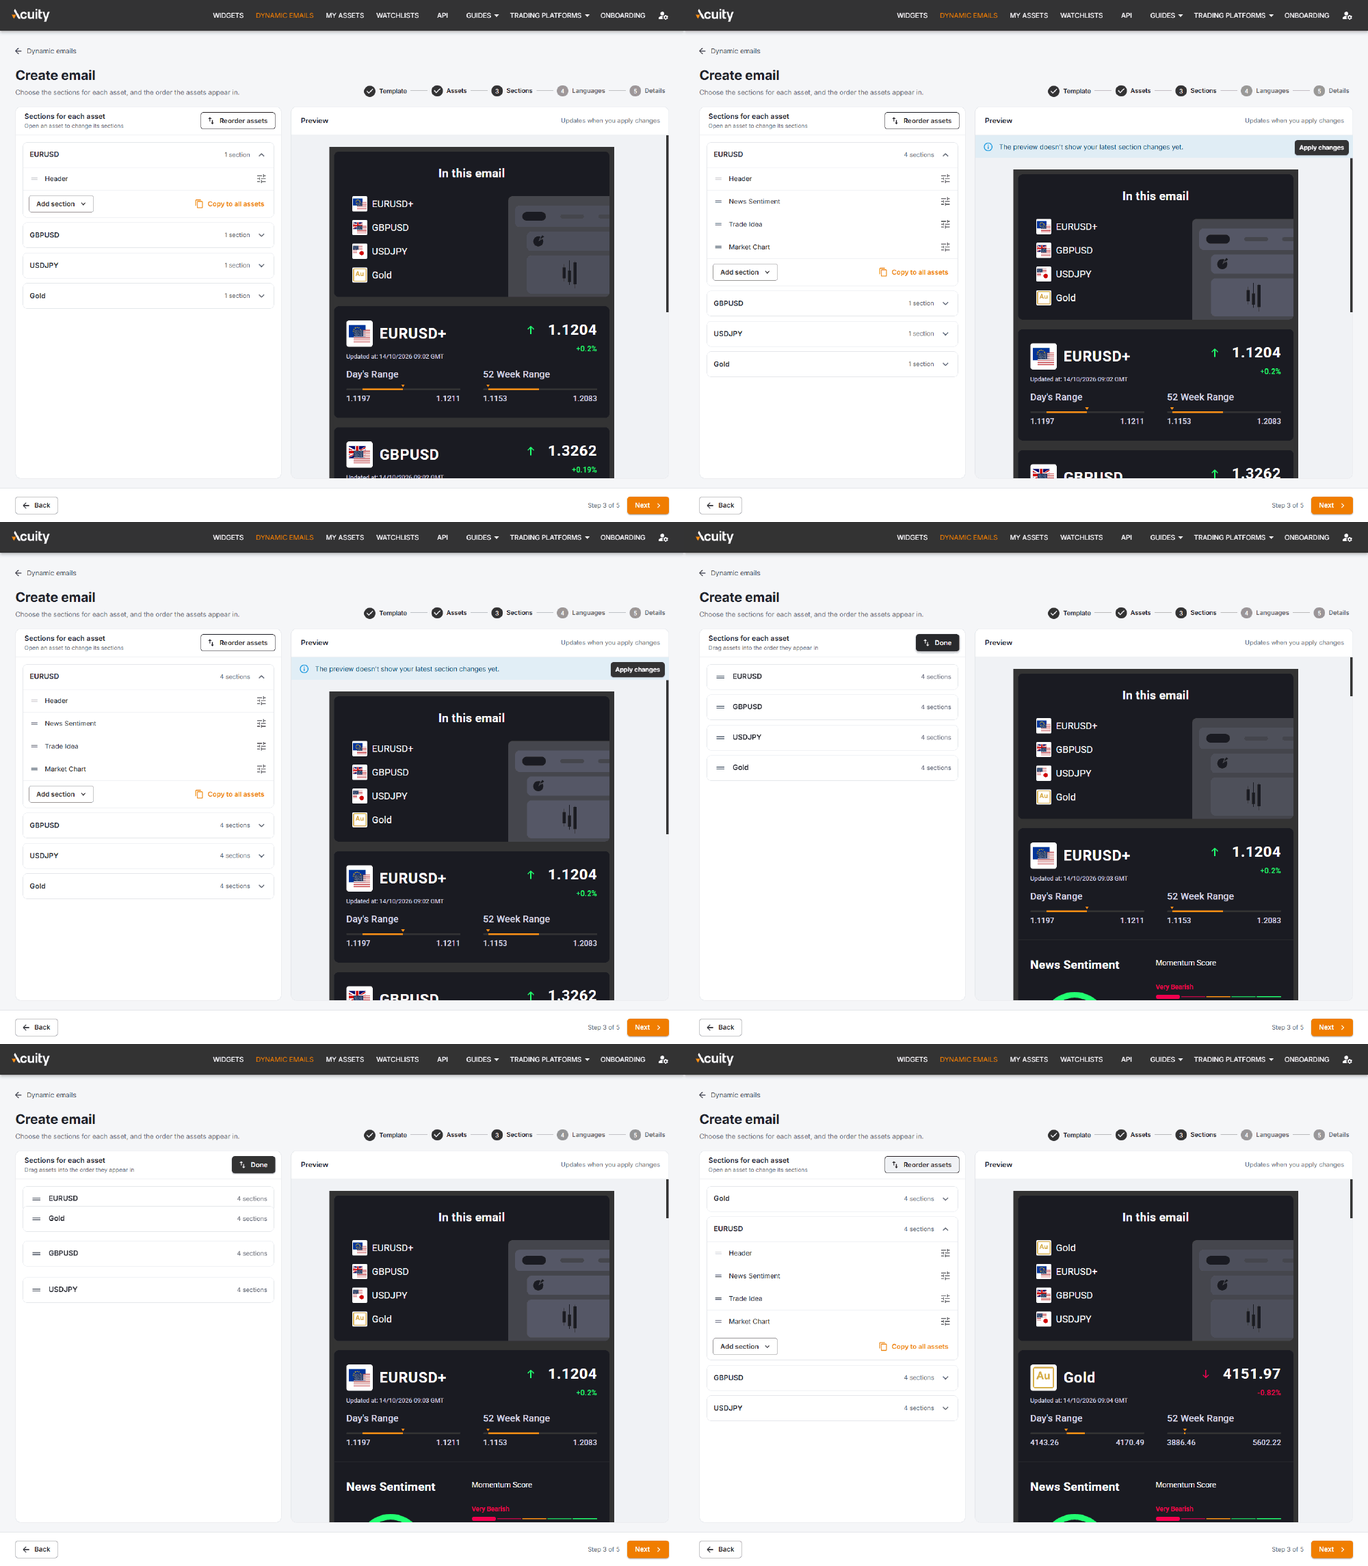
In a Multi Asset email, every asset has its own list of sections. The sections are the same as above, but the steps are slightly different:
- Click an asset to open it.
- Click Add section and choose the sections you want for that asset. Drag them to change their order, and use the settings icon to set up blur, call to action and title.
- To use the same sections for every asset, click Copy to all assets and confirm with Copy.
- To change the order in which the assets appear in the email, click Reorder assets, drag the assets into place and click Done.
- Click Apply changes above the preview to see your latest changes.
Languages
Pick the languages your email is created in. You need at least one.
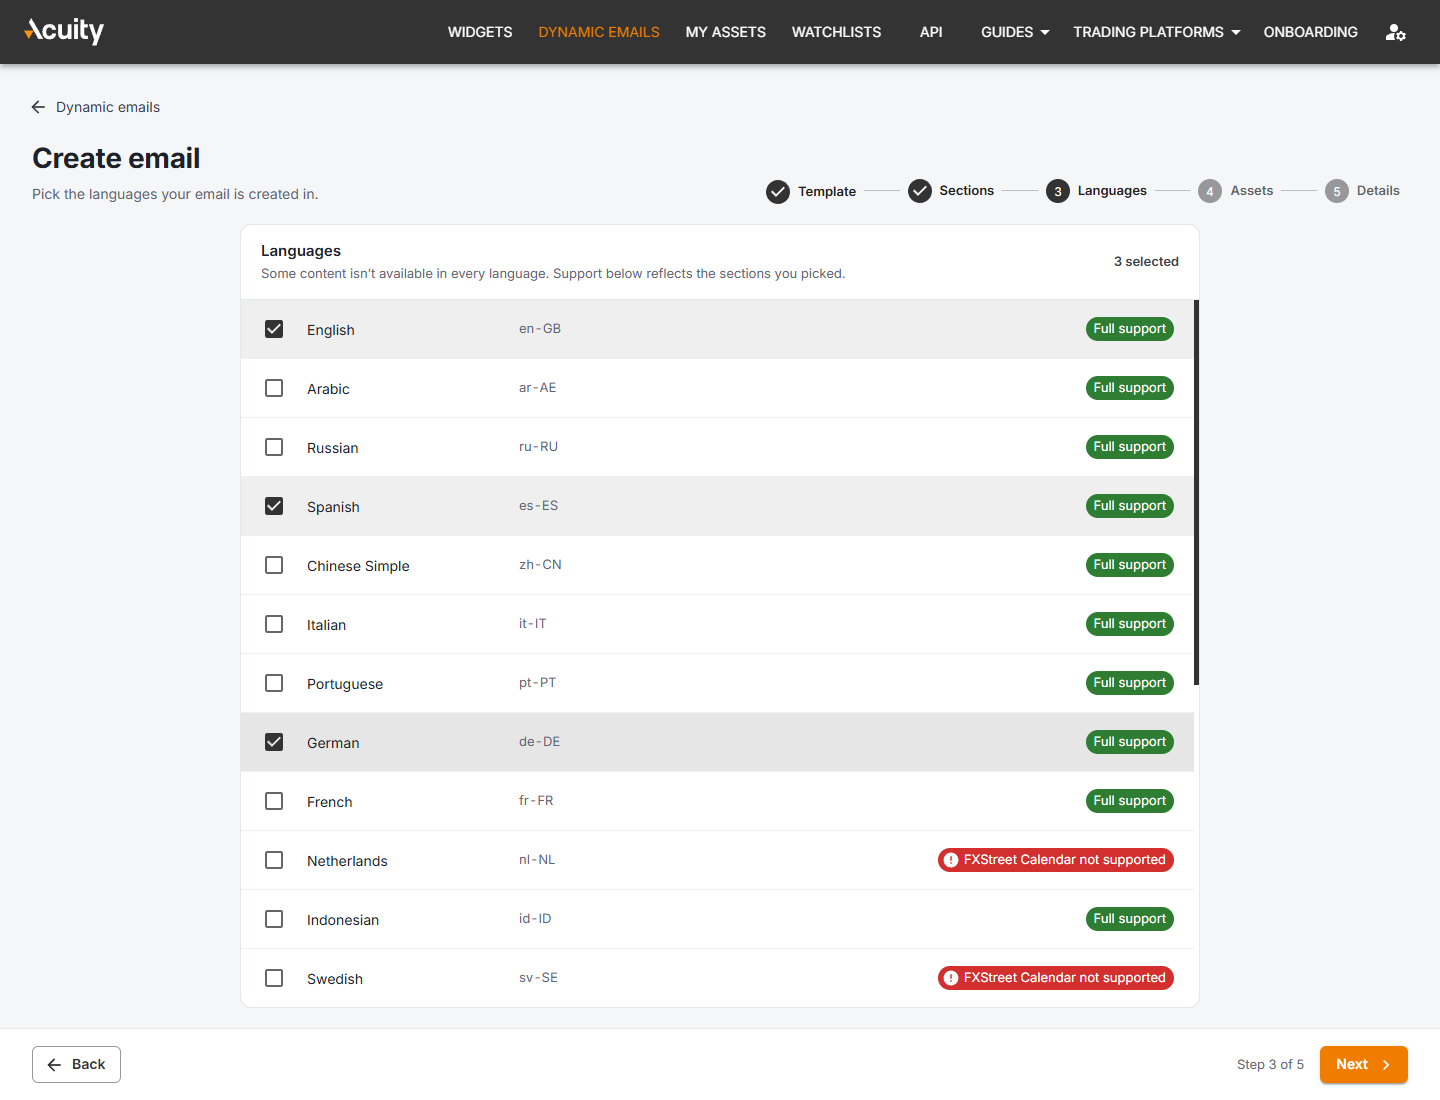
Not all content is available in every language. Next to each language you'll see:
- Full support – all the sections you picked are available in this language.
- "… not supported" – some content isn't available in this language, for example FXStreet Calendar not supported. The sections that use that content may not be translated in this language.
The support shown always reflects the sections you picked. Always check the preview in each language before you submit, especially for right-to-left languages such as Arabic and Farsi.
Assets
Choose the assets your email covers.
- Single Asset email – each asset gets its own email. There's no limit on the number of assets, but every asset you add creates more emails.
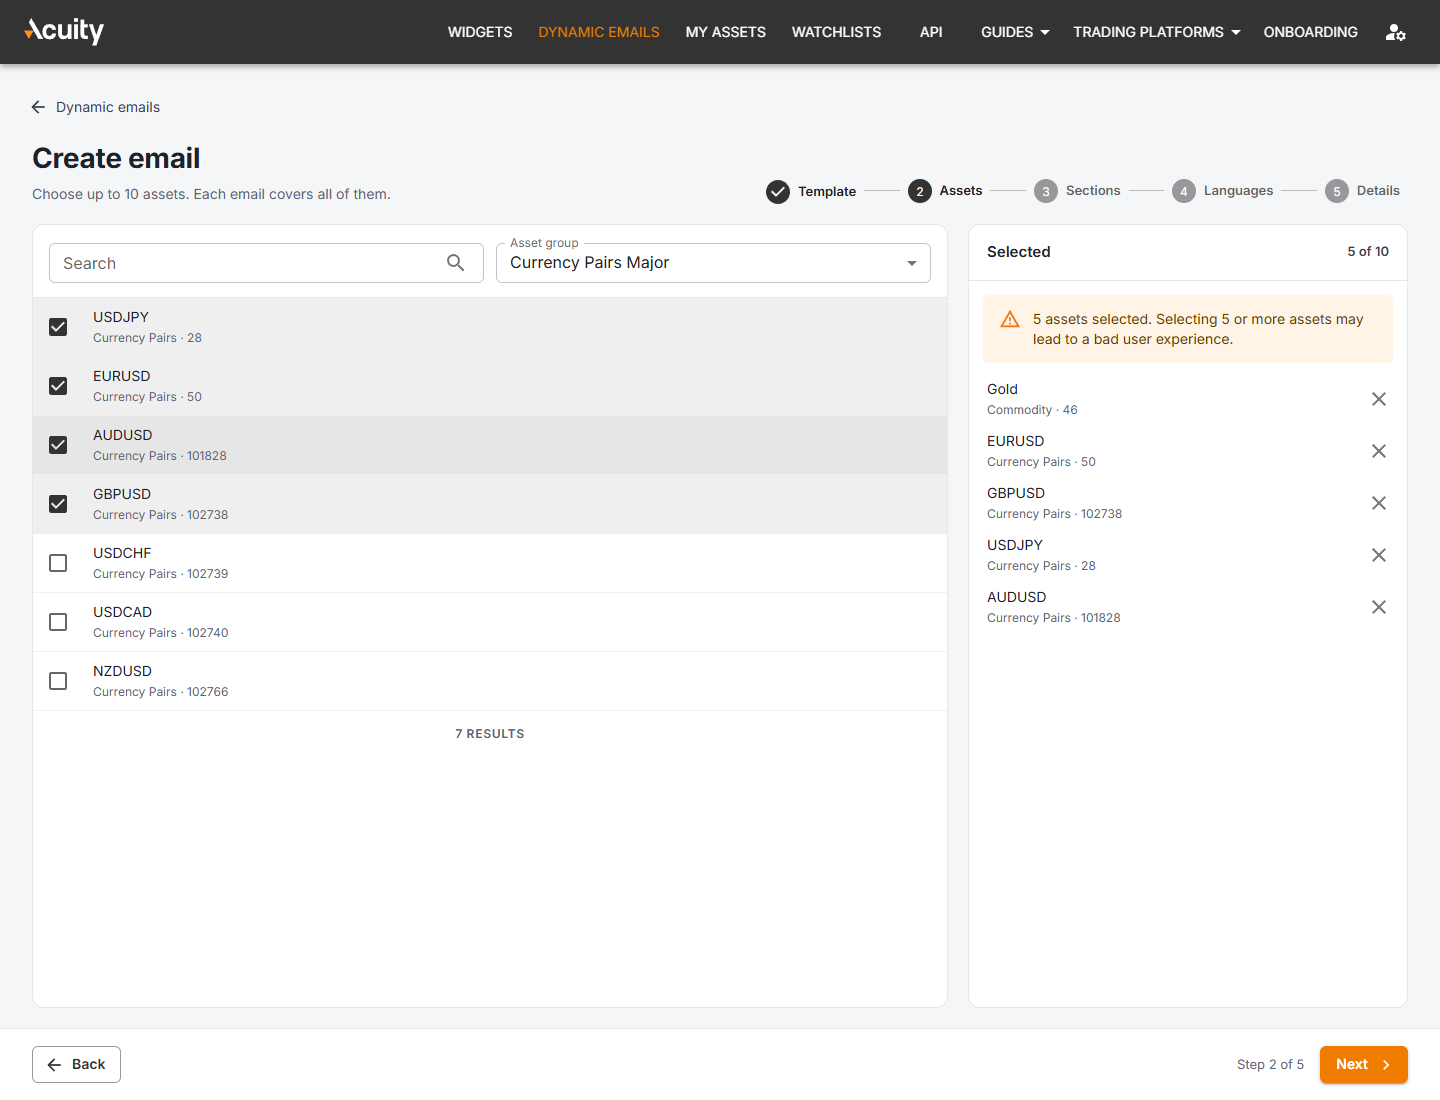
- Multi Asset email – choose up to 10 assets. For the best reading experience, we recommend no more than 4. Longer emails are rarely read to the end, so you'll see a warning from 5 assets.
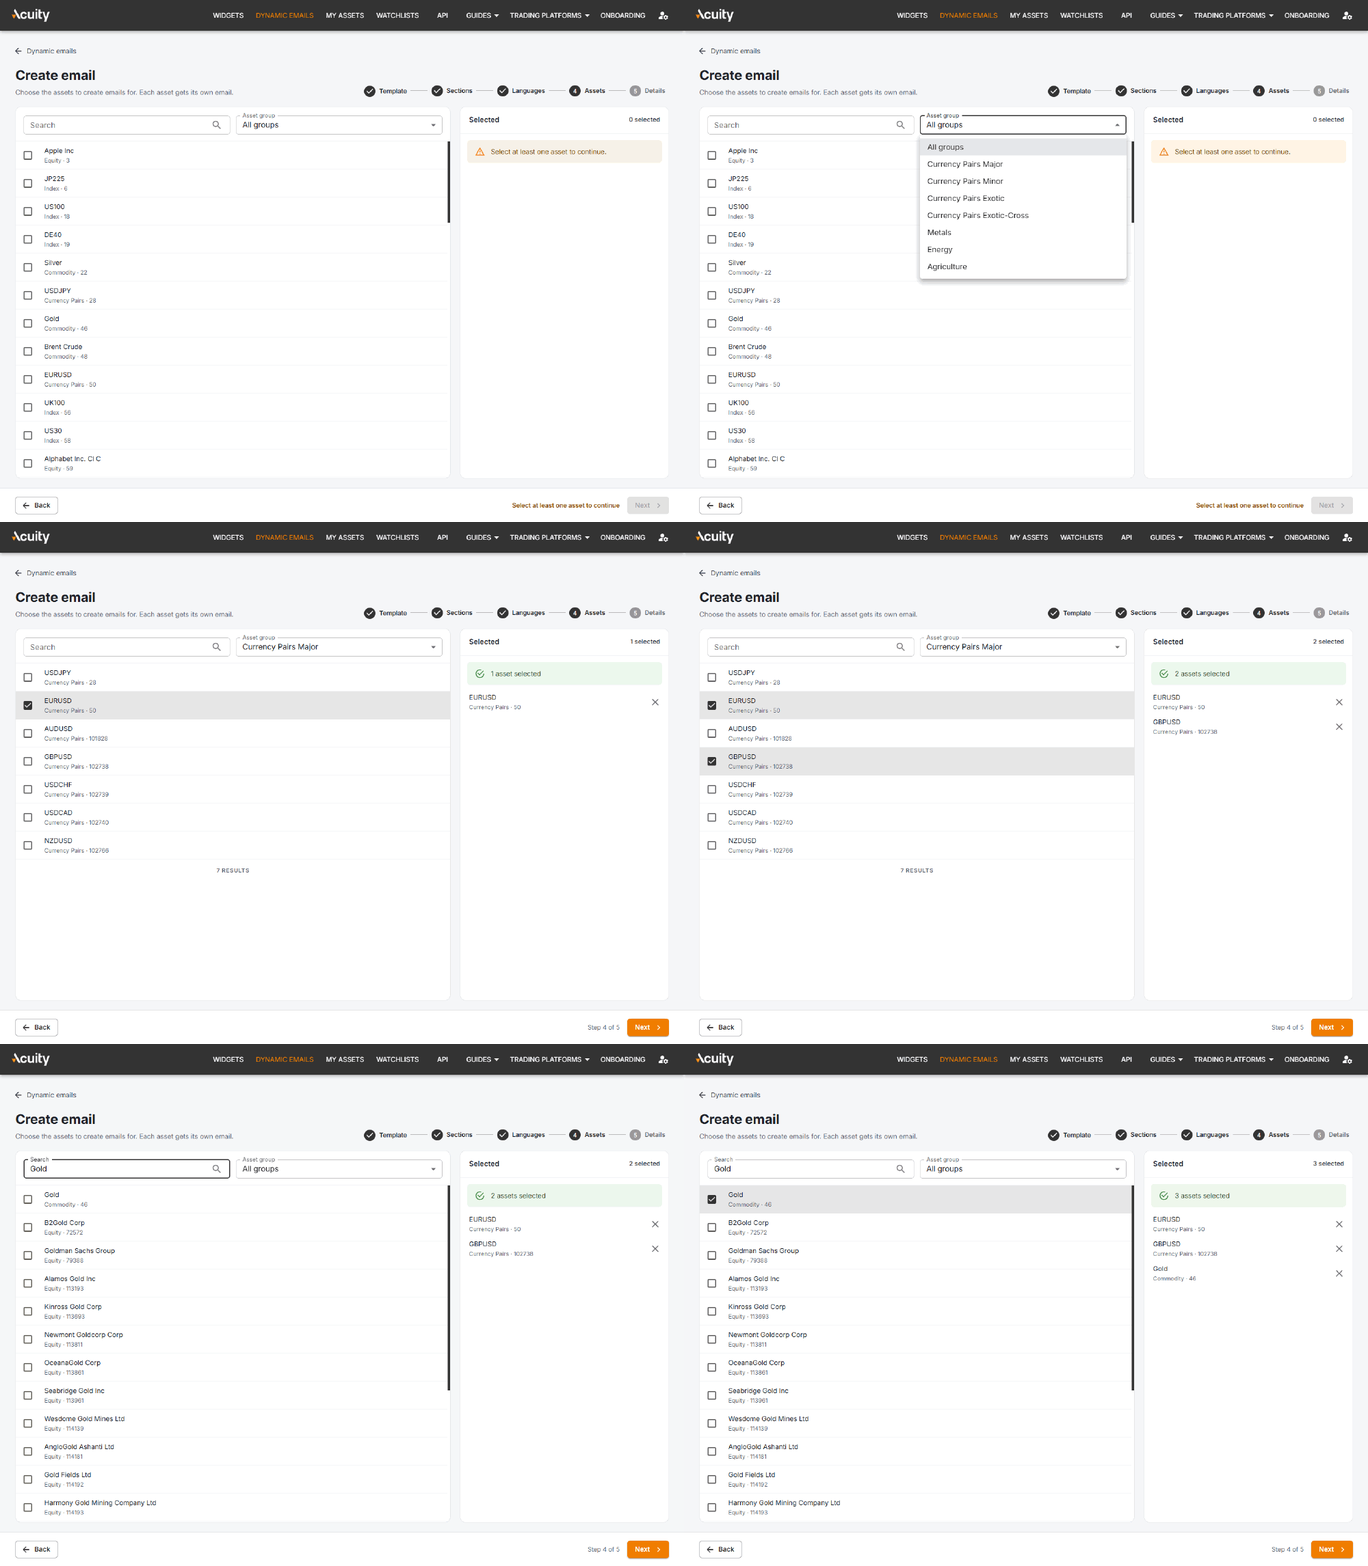
To find assets:
- Pick a list in Asset group: Currency Pairs Major, Minor, Exotic and Exotic-Cross, Metals, Energy or Agriculture.
- Or type a name in Search and press Enter (or click the magnifying glass). Use search for stocks and indices.
Tick an asset to add it. Your selection appears on the right, where you can remove an asset with the × button.
Details
Name your email and choose how it updates.
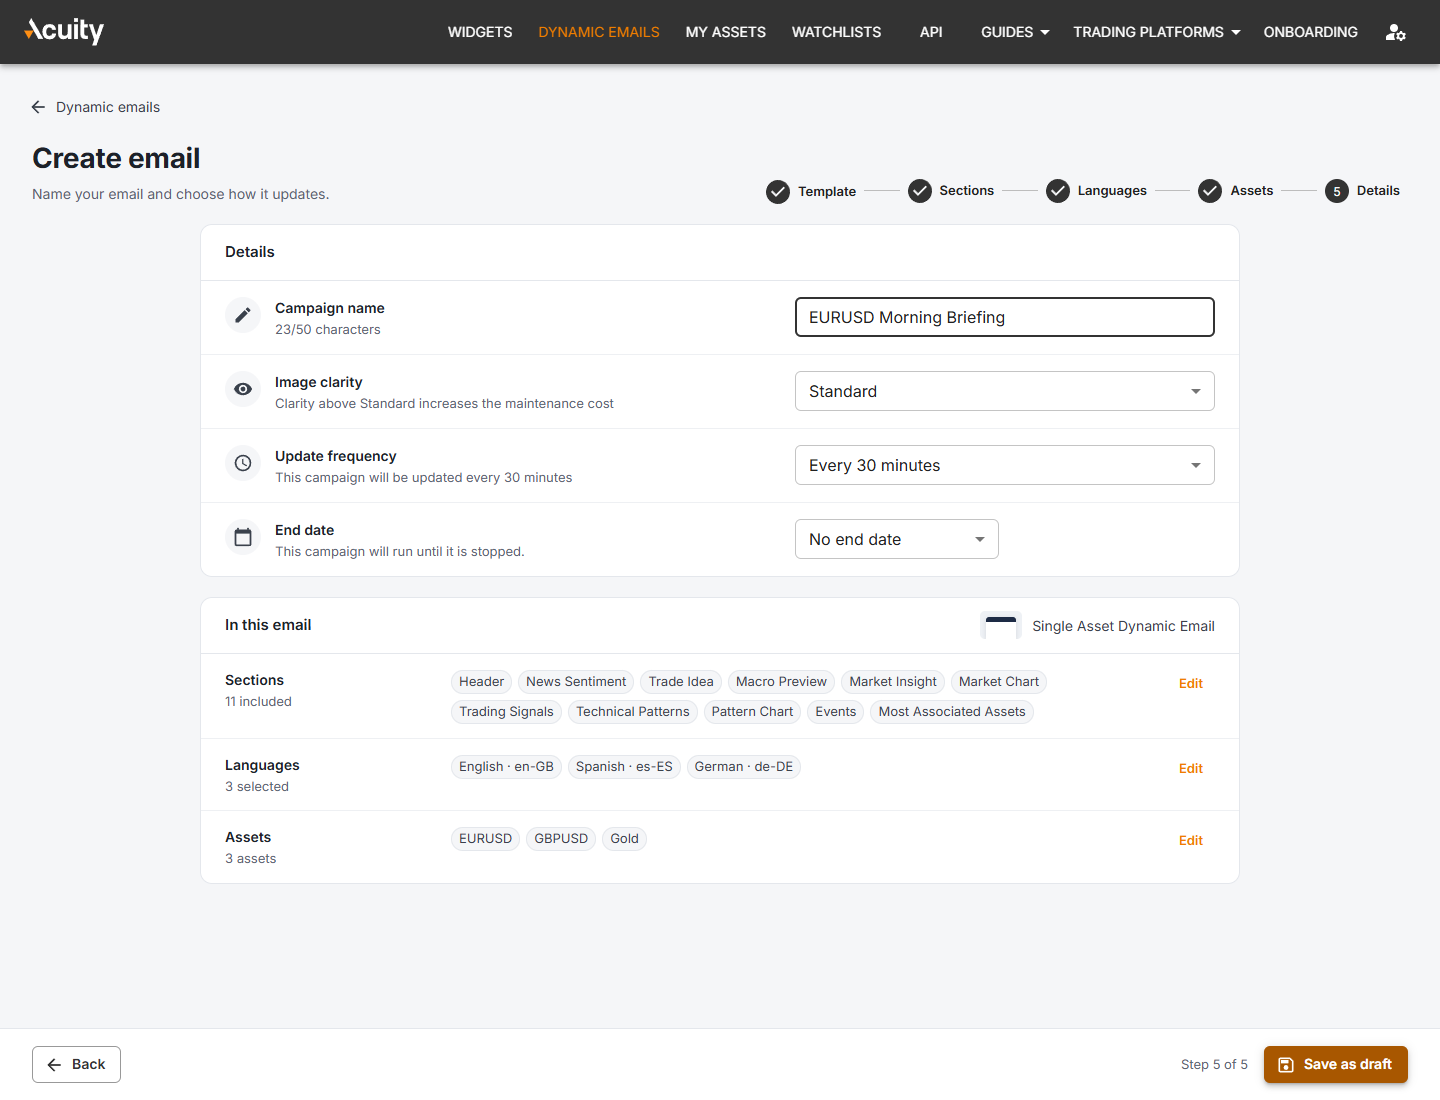
- Campaign name – up to 50 characters. Only you see it.
- Image clarity – how sharp the email looks. Standard suits most emails. Enhanced and Max look sharper on high-resolution screens, but increase the maintenance cost.
- Update frequency – how often the email's content is refreshed: Every 10 minutes, Every 30 minutes (default) or Every hour.
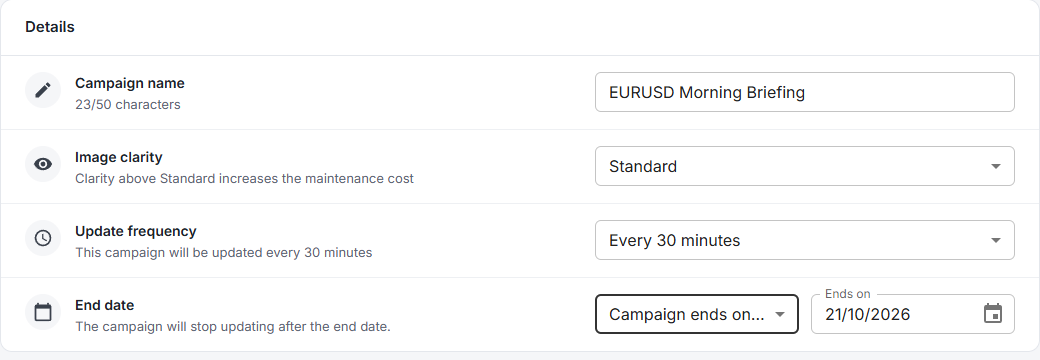
- End date – choose No end date to keep the email running until you stop it, or Campaign ends on… to pick the date after which it stops updating.
In this email summarises your choices. Click Edit next to any group to go back and change it.
Click Save as draft. Your email is saved and its page opens, where you can customise its look.
Customising your email
The email page
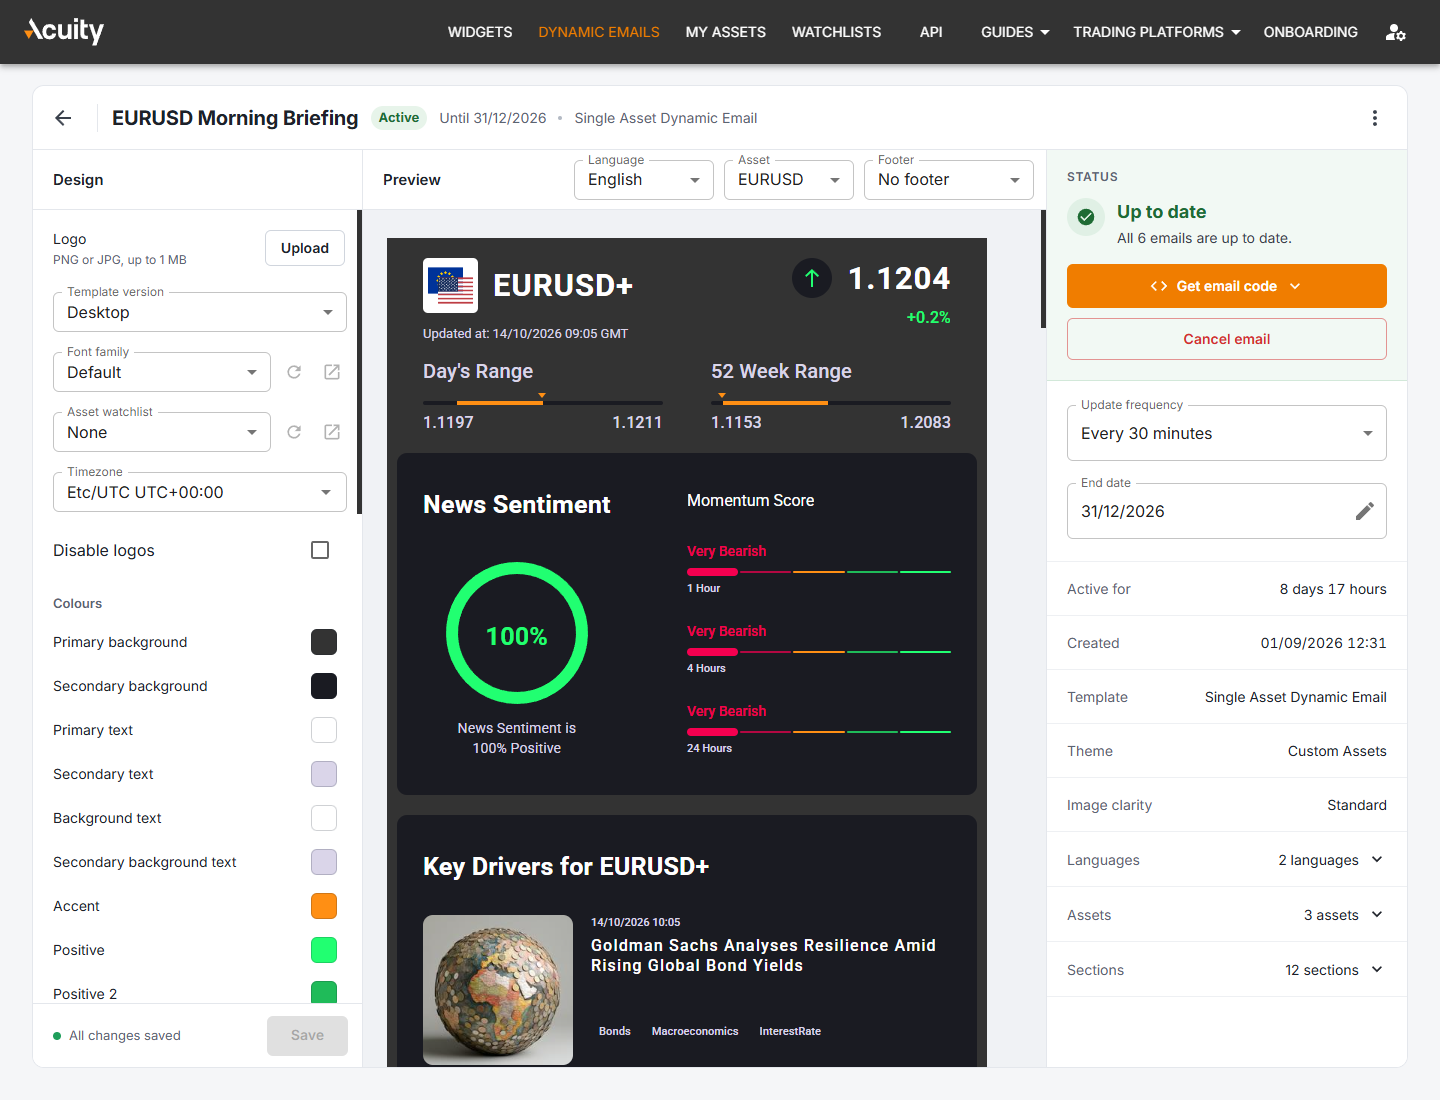
Every email has its own page, with three columns:
- Design (left) – the look of the email.
- Preview (centre) – how the email looks right now.
- Status and settings (right) – what's happening with the email, its main actions, and its settings.
Design
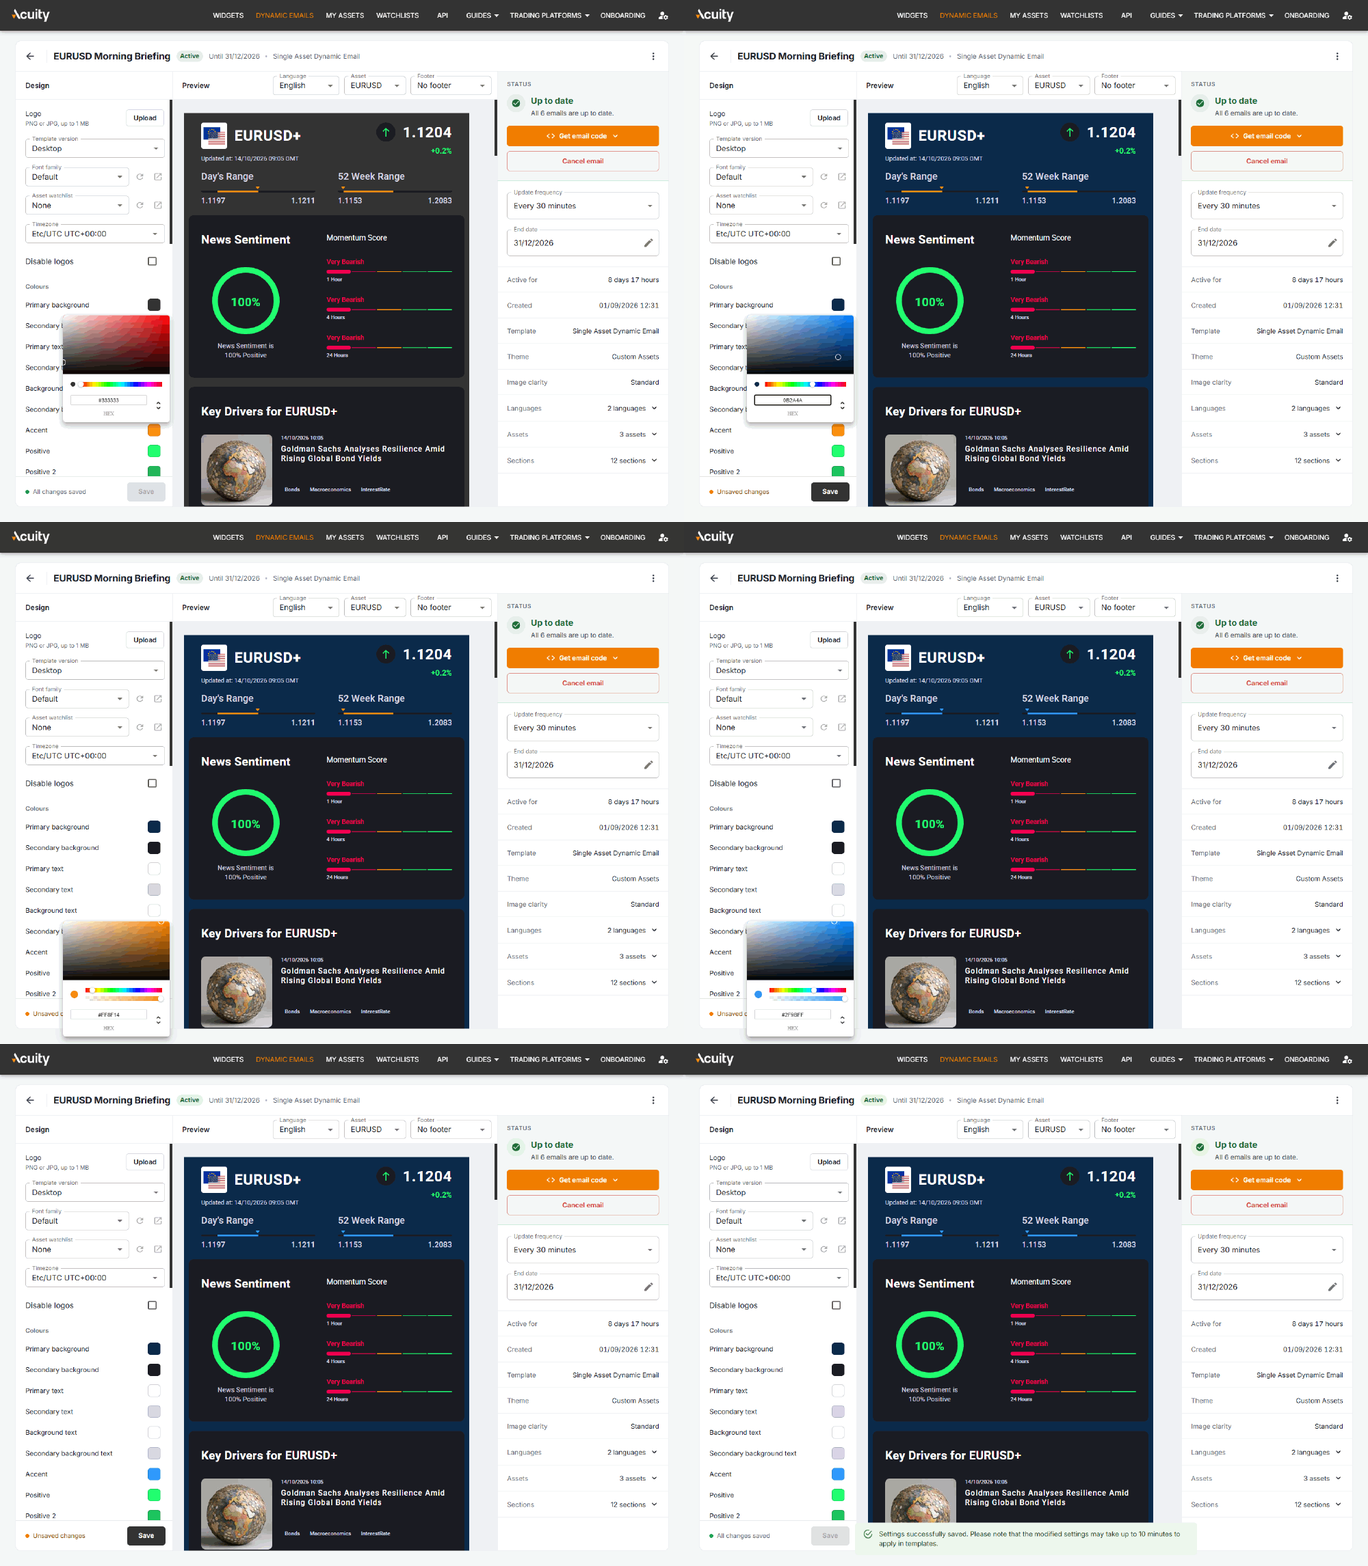
Change the look of your email to match your brand:
- Logo – click Upload to add a PNG or JPG file of up to 1 MB. It appears at the top of the email. It doesn't have to be just a logo; you can upload a full email header.
- Template version – Desktop or Mobile layout.
- Font family – choose one of your fonts. Fonts are managed on the Fonts page (Manage fonts in a new tab). After adding a font there, click Refresh fonts.
- Asset watchlist – shown when the email includes the Most Associated Assets section. Choose one of your watchlists so that section works with the assets in it, for example the instruments you offer. Manage watchlists with Manage watchlists in a new tab, then click Refresh watchlists.
- Timezone – the timezone used for dates and times in the email.
- Disable logos – hide the asset logo next to the asset name.
- Display summary – Multi Asset emails only. Shows the "In this email" summary of assets at the top.
- Colours – change the colour of every part of the email: backgrounds, text, accents, positive and negative values, buy and sell, news categories, event impact, call-to-action buttons, the footer text and more. Click a colour to change it.
- Footer text align – left, centre or right.
Click Save when you're done. The note next to the button shows whether you have Unsaved changes. Saved changes reach your emails within 10 minutes.
Preview
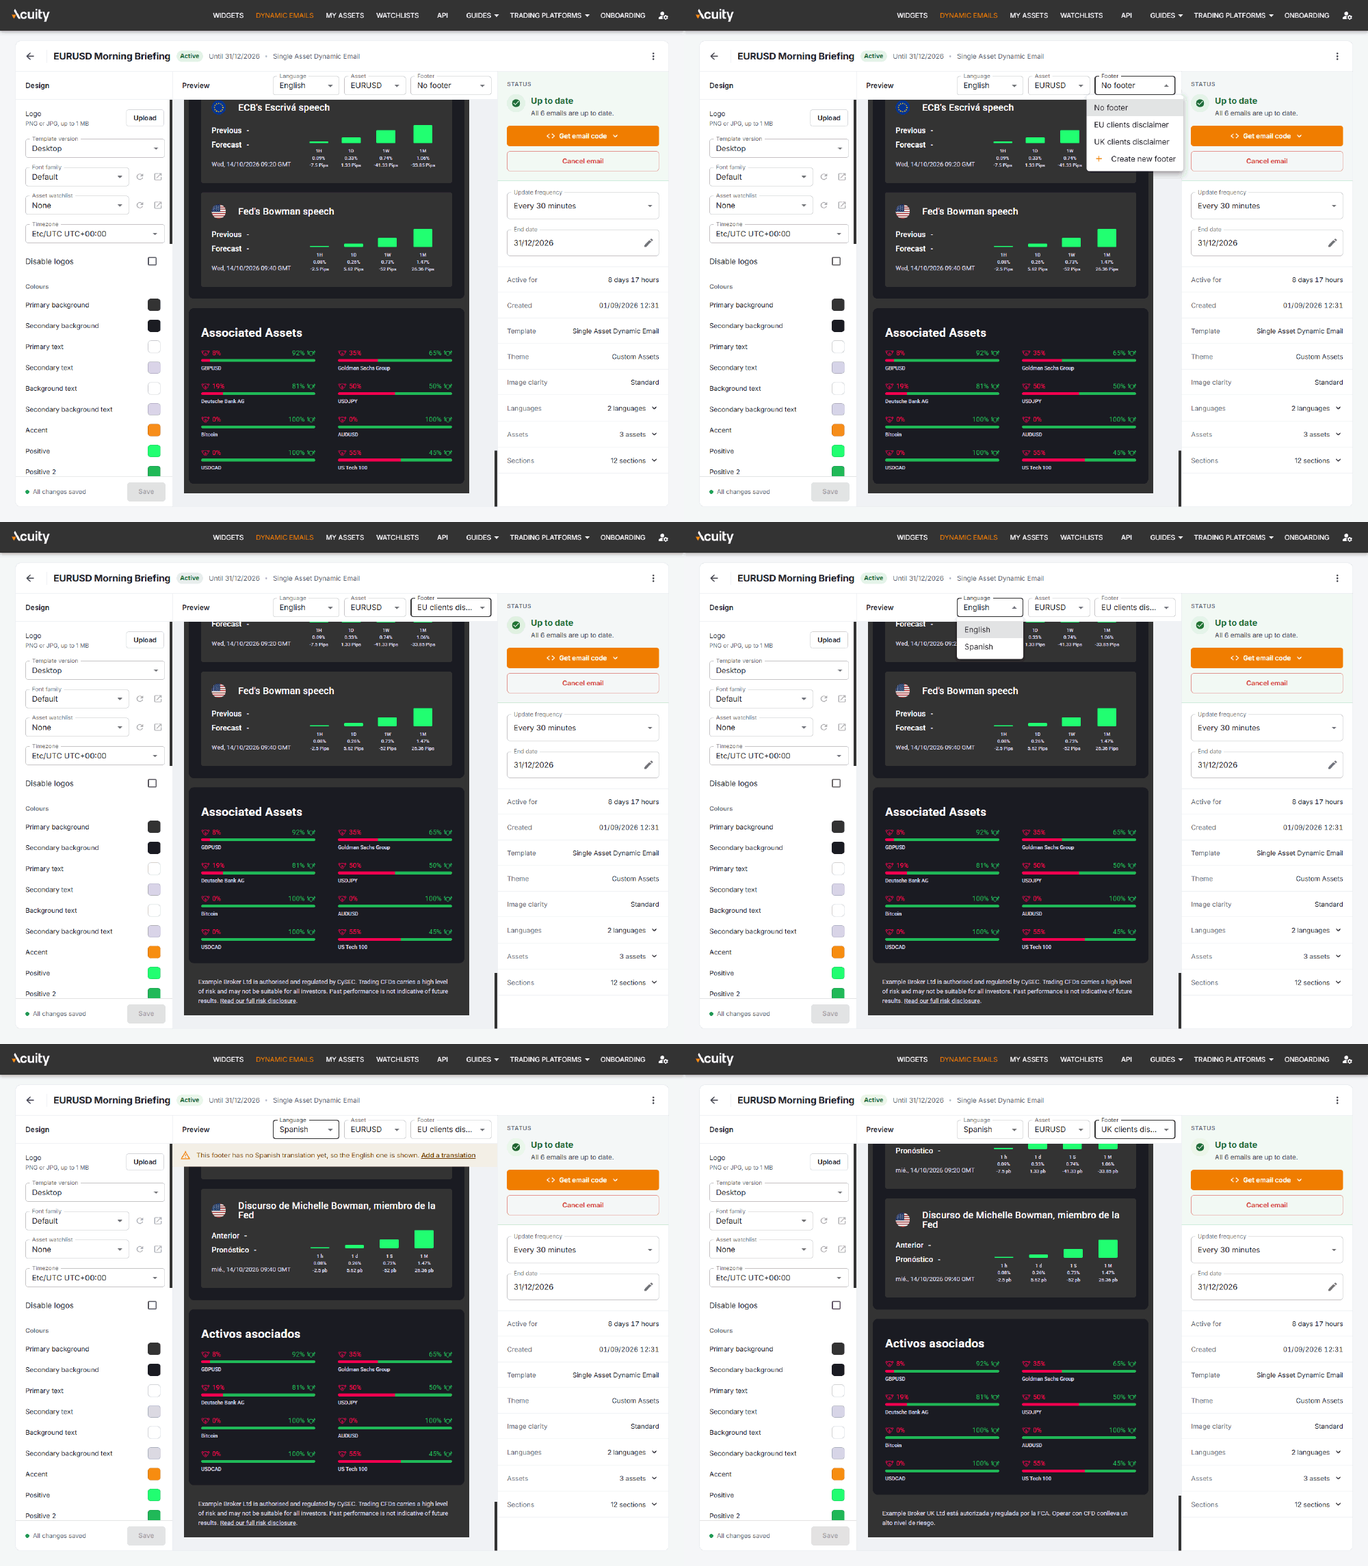
Use the selectors above the preview to check every version of your email:
- Language – one of the languages you picked.
- Asset – one of your assets (Single Asset emails).
- Footer – one of your footers, or No footer.
If the footer you picked has no translation for the selected language, a note tells you whether the English version is shown instead. Use Add a translation to fix it.
What you can change, and when
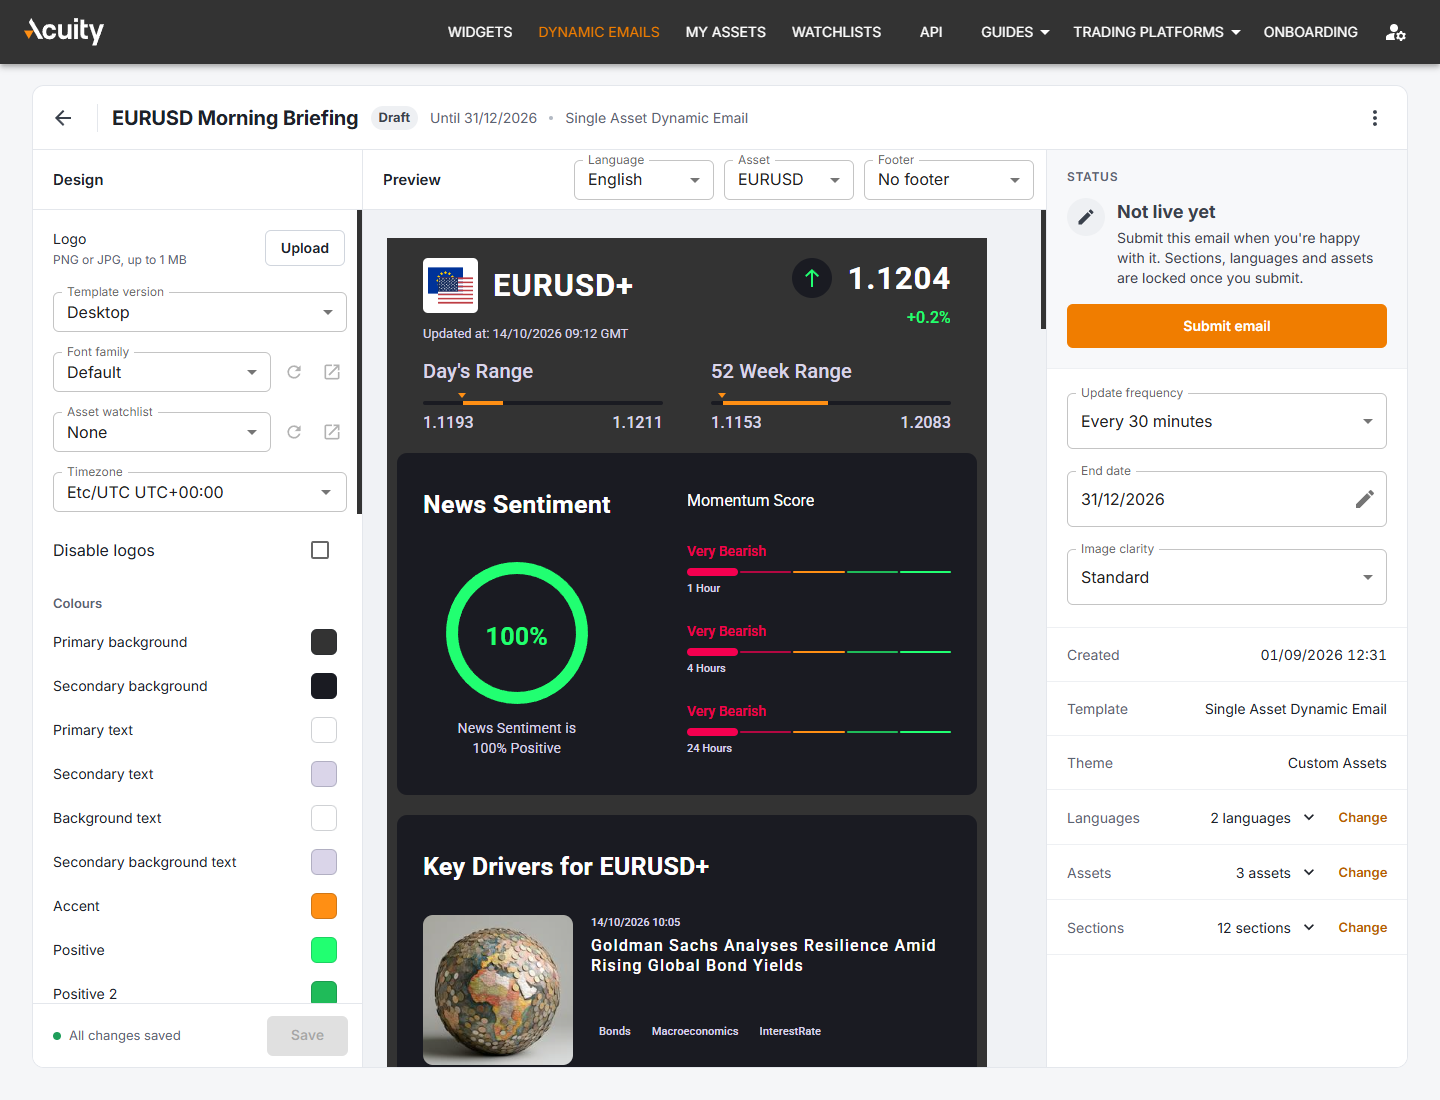
| Draft | Submitted / Active | Ended | Cancelled | |
|---|---|---|---|---|
| Design (logo, fonts, colours…) | ✓ | ✓ | – | – |
| Section blur, call to action and title | ✓ | ✓ | – | – |
| Adding, removing and reordering sections | ✓ | – | – | – |
| Languages and assets | ✓ | – | – | – |
| Image clarity | ✓ | – | – | – |
| Update frequency | ✓ | ✓ | – | – |
| End date | ✓ | ✓ | ✓ | – |
While the email is a draft, use Change next to Languages, Assets and Sections in the right column to edit them.
Once the email is submitted, open Sections in the right column and click the pencil next to a section to change its blur, call to action or title. Your emails pick up the change within 10 minutes.
To change sections, languages or assets after submitting, make a copy of the email (see Copying and deleting an email). The copy is a new draft that you can change freely.
Email footers
Footers hold your disclaimers, legal notices and any other text you want at the bottom of your emails.
Footers aren't part of an email's design. You choose the footer when you get the email code. This means one email can be sent with different footers, for example to clients in different jurisdictions (CySEC, FCA, etc.), without creating a copy of the email for each one.
Creating footers
- On the Dynamic Emails page, click the Footers button.
- Click New footer, enter a Name and an optional Description (only you see it), and click Create.
- Click Add translation, choose the Language, and enter the Text. You can use plain text or HTML, for example to add links or bold text. Click Save.
- Repeat step 3 for every language your emails use.
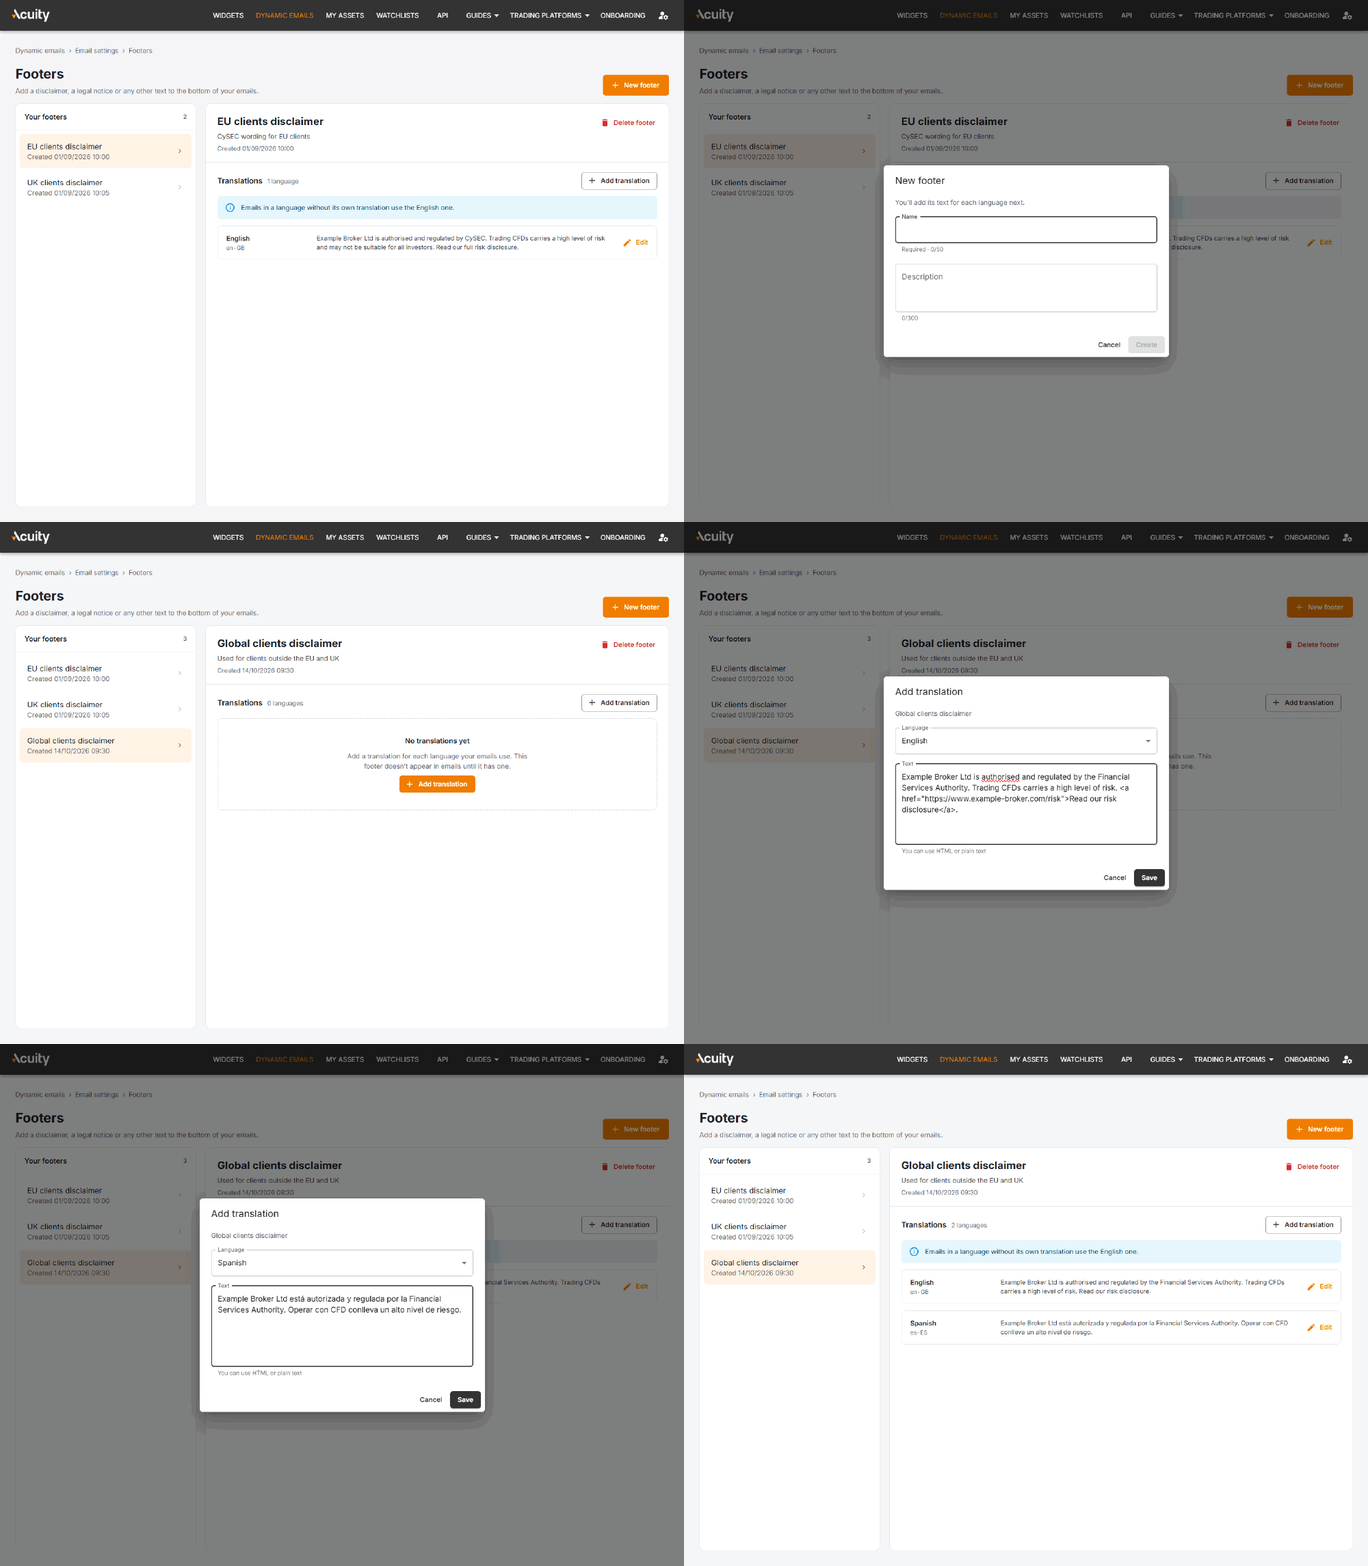
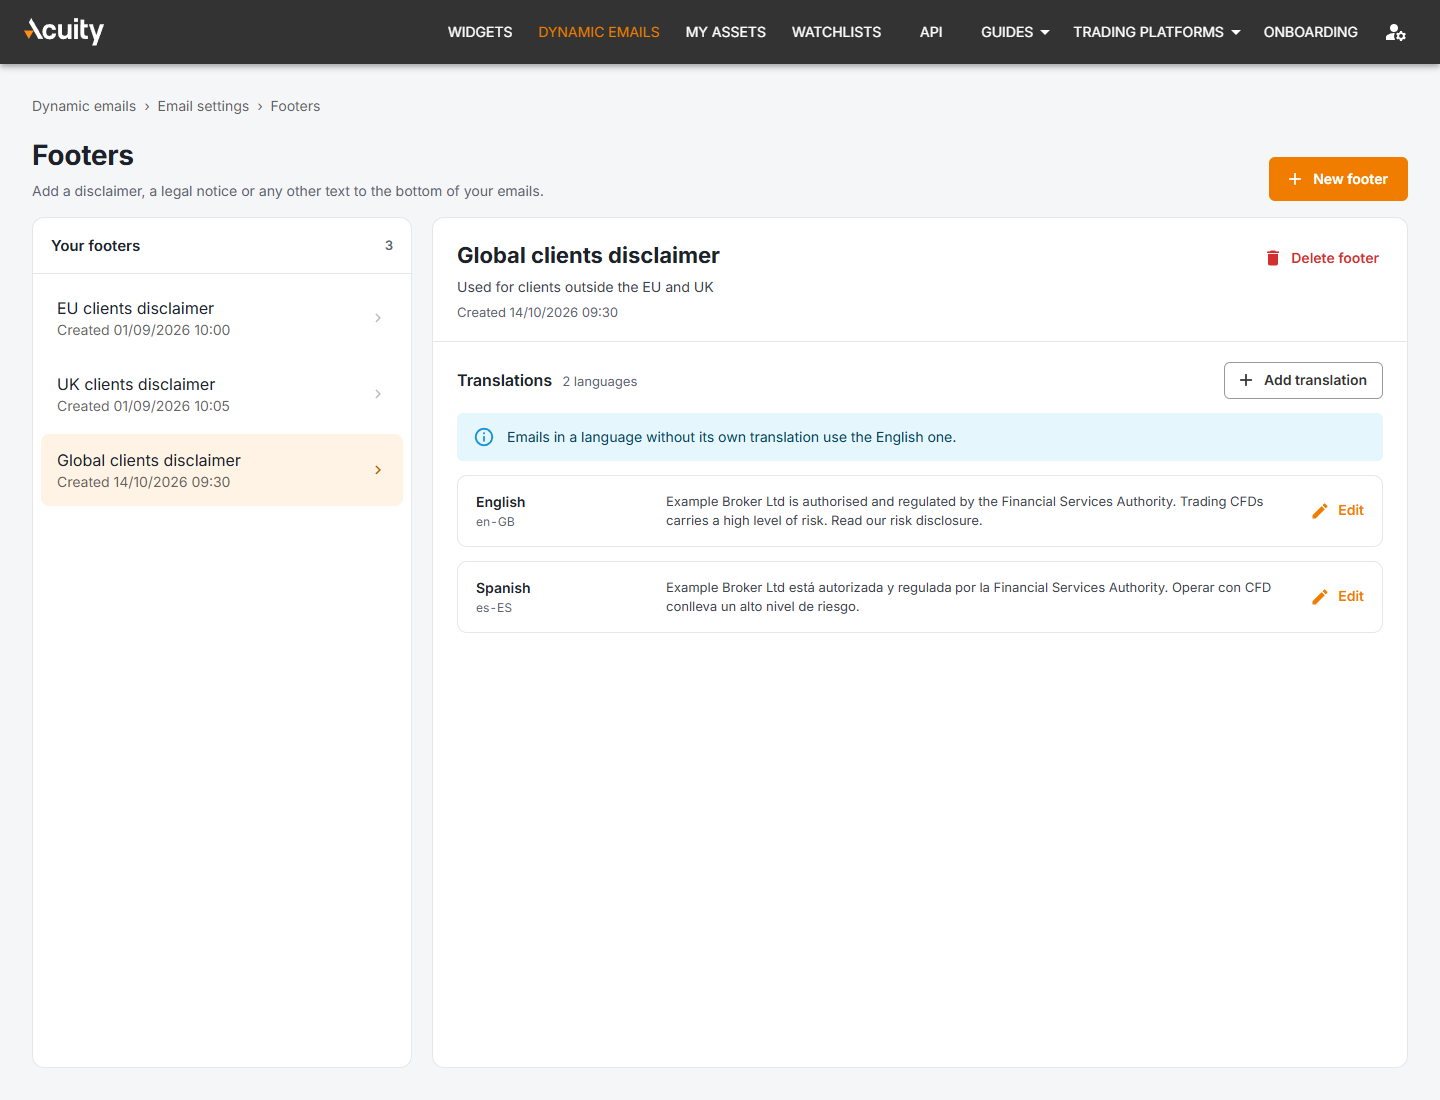
Click Edit on a translation to change or delete it, or Delete footer to remove the whole footer.
Tip: always add an English translation. Emails in a language without its own translation use the English one. A footer with no translations isn't shown in emails.
Using footers
You choose a footer:
- in the Footer selector above the preview, to see how it looks and to get the code for one email;
- when you download all the emails of a campaign, or all your active emails.
The footer's language is picked automatically to match the email's language.
Going live
Submitting your email
When you're happy with your draft, click Submit email in the right column and confirm with Submit.
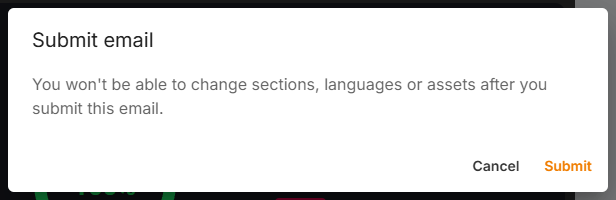
Once submitted, sections, languages and assets can no longer be changed. You can still change the design, update frequency, end date, and the blur, call to action and title of each section.
Our team then switches the email on, and you'll receive an email when its status changes. If we have a question about your setup, we'll get in touch, and any note we leave appears under Comment on the email's page.
Note: an email with an end date in the past can't be submitted. If that's the case, you'll be asked to choose a new end date first.
Email status
The Status box at the top of the right column always tells you what's happening with your email, and shows the main action for it:
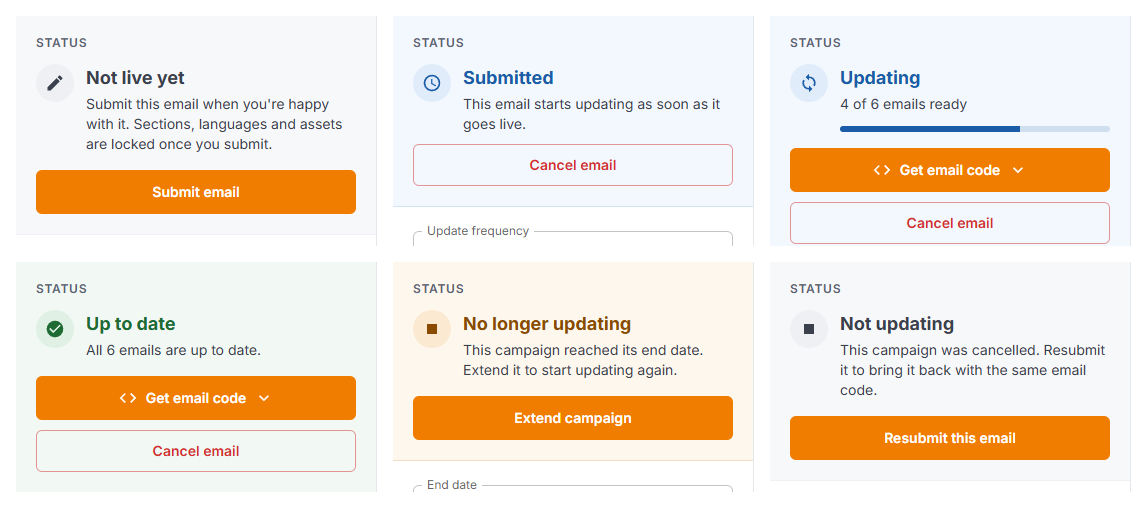
- Not live yet – the email is a draft. Submit it when you're ready.
- Submitted – the email starts updating as soon as it goes live.
- Updating – the email has just gone live or has new changes, and is getting ready. You'll see how many emails are ready.
- Up to date – all your emails are up to date and ready to use.
- Applying your latest changes – your recent changes are on their way. Your emails update automatically.
- Updates delayed – some emails are taking longer than usual to update.
- Update issue – some emails couldn't be updated. We keep retrying, but please contact support if this persists.
- No longer updating – the email reached its end date. Click Extend campaign to start updating again.
- Not updating – the email was cancelled. Click Resubmit this email to bring it back.
End date, update frequency and cancelling
- Update frequency – change it at any time in the right column: every 10 minutes, every 30 minutes or every hour.
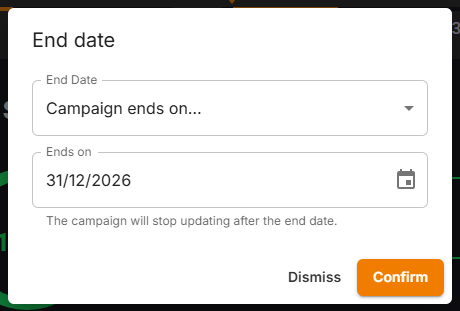
- End date – click the pencil next to End date to choose a new date or No end date. You can extend or shorten an email at any time. An ended email starts updating again as soon as you move its end date forward.
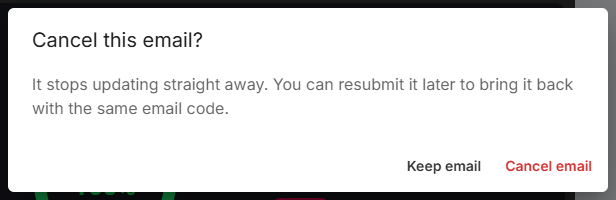
- Cancel email – stops the email from updating straight away. Emails you've already sent keep showing their last content.
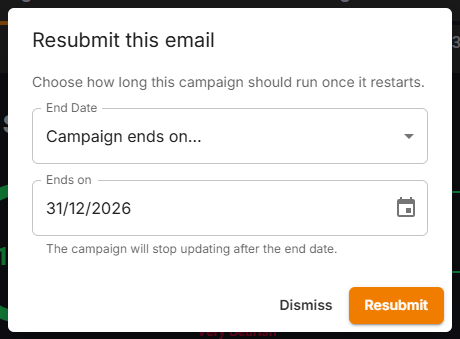
- Resubmit this email – brings a cancelled email back. Choose how long it should run and click Resubmit. It keeps the same email code, so you don't need to paste the code into your email platform again.
Copying and deleting an email
Click the ⋮ (More actions) button at the top right of the email page:
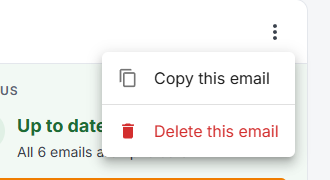
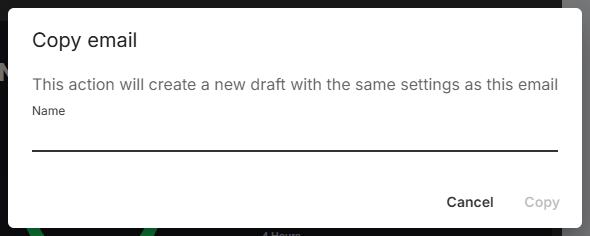
- Copy this email – creates a new draft with the same settings, under the name you choose. Use it to create a variation of an email, or to change the sections, languages or assets of an email you've already submitted. The copy has its own email code and needs to be submitted. Its end date isn't copied.
- Delete this email – deletes the email for good. This can't be undone. If you only want to stop it for a while, cancel it instead.
Adding the email to your email platform
Once the email is Active, its code is available from the Get email code button in the right column. You only need to add the code to your email platform once. After that, the content of the email updates automatically, so every send shows recent market data.
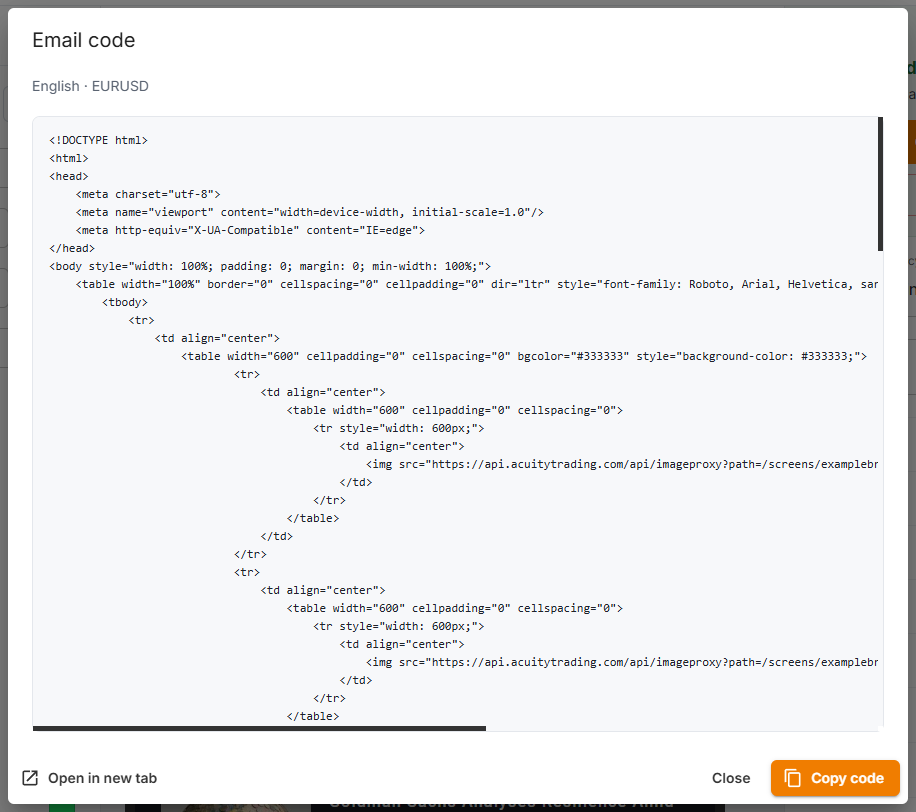
The code is a ready-to-send HTML email, 600 pixels wide, built for email clients. Paste it into the HTML or code editor of your email platform or CRM.
Copy the code for one email
- Use the Language, Asset and Footer selectors above the preview to choose the email you need.
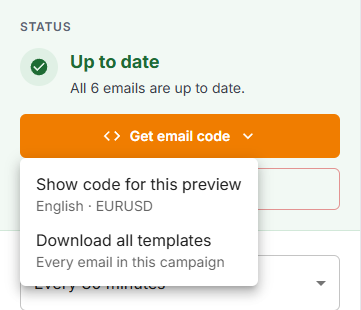
- Click Get email code → Show code for this preview.
- Click Copy code and paste it into your email platform. Open in new tab shows the email in your browser.
If you've just made changes, you may see a note that your latest changes haven't reached the email yet. The code is still ready to use, and the email updates automatically.
Download all emails of a campaign
If your email has several assets and languages, you can get all of them at once:
- Choose the Footer you want in the selector above the preview.
- Click Get email code → Download all templates.
- Click Download zip.
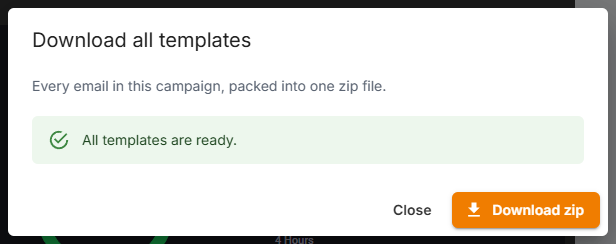
The zip file contains one HTML file per asset and language, named Asset(language).html, for example EURUSD(en-GB).html. If you use several footers, repeat these steps for each one.
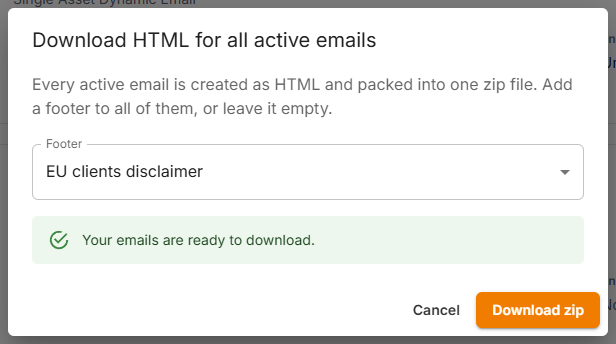
Download all your active emails at once
To get every active email you have, across all your campaigns:
- On the Dynamic Emails page, click the Download HTML button.
- Choose a Footer, or No footer.
- Click Create emails, and then Download zip.
If you have any questions, or would like help setting up your emails or adding them to your email platform, please don't hesitate to contact us. We are here to help!