- Customisable widgets
- Customisable components
- Default Trading Platform Setting
- Disclaimer
- Using a customised widget
- What to do if a setting you need can’t be customised
Customisable widgets
If you see a Customize button when hovering over the widget, this means that you can change the widget’s settings to suit your needs.

This is applicable to both React-based widgets, as well as iframe-based ones.
Most widgets require a setting to be created to work. If this is the case for the widget you are interested in, you will be asked to configure it the first time you open it. Don’t worry, you can always change the setting later.

Customisable components
Different widgets can support customisation of varying depths depending on the use case, but most widgets support customizing the following components.
Fonts
To ensure that the widgets are matching your brand guidelines fully, we support adding custom fonts to the widgets.
When no fonts are added, the font selection dropdown menu will be set to "Inherit". This option means that the widget will use the font family that is connected to your website.
This is particularly useful when you have multiple sites where widgets are going to be added, and each of them has a different font. In this case the widget will inherit the font from your site/application.
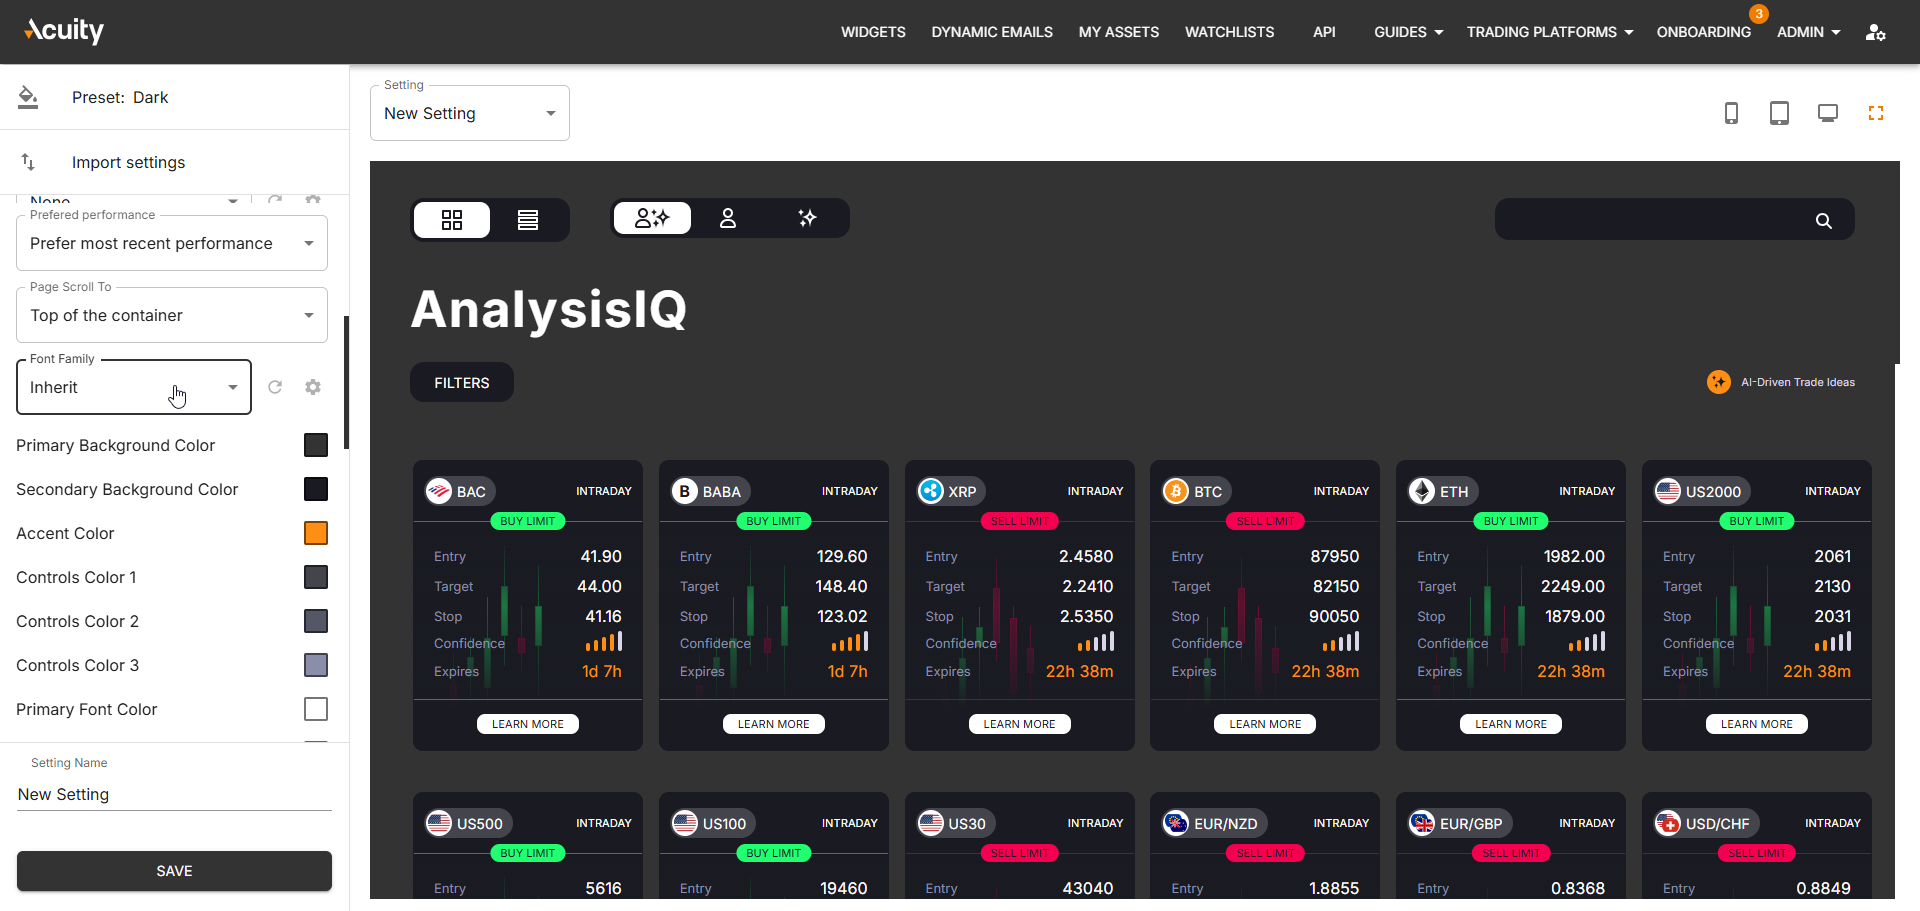 If you want to use a custom font, it's possible to do this as well. You can access the font management page within your account settings by clicking the "Manage" icon next to the font selection dropdown in the widget settings, or by navigating to your account settings page and choosing "Fonts" in the "Widgets" menu.
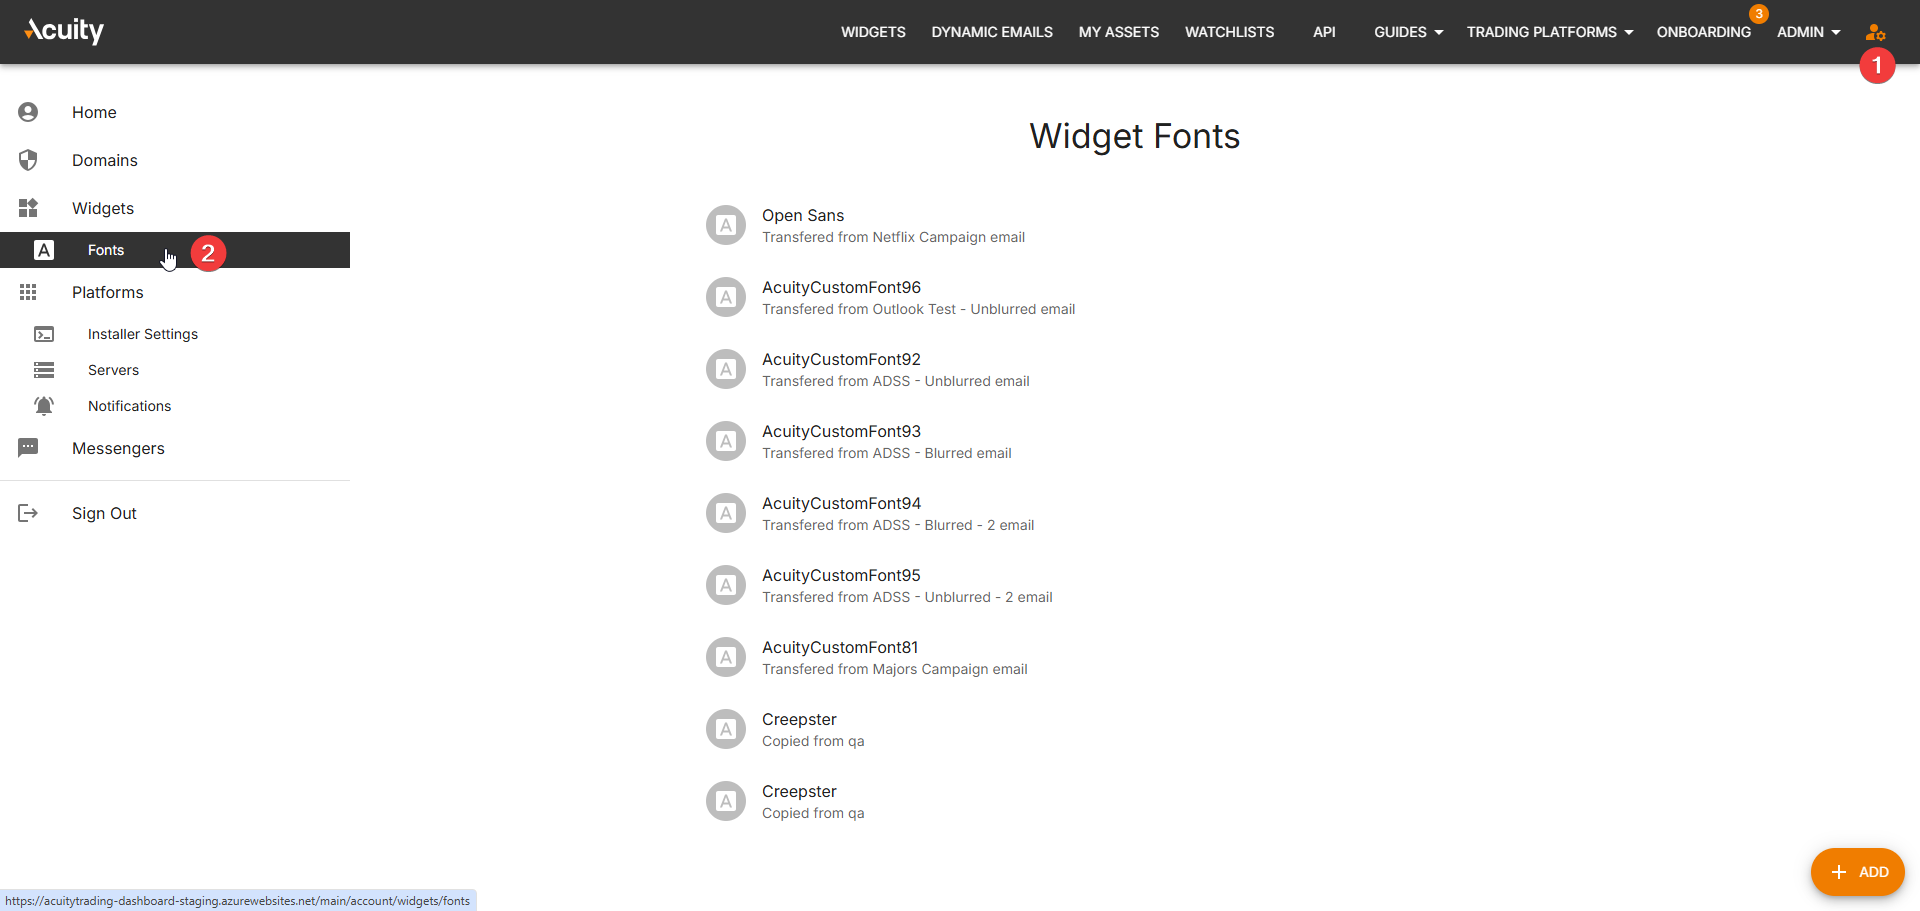
You can either add a public font (available via a platform like Google Fonts) or upload a private font.
Adding a font
- Click the "Add" button in the bottom-right corner of the Widget Fonts page.
- Name the font family. This is the name that will appear in the font selection dropdown in the widget.
- Click the newly added font family in the Widget Fonts page
If you leave things as they are at this point, you will need to ensure that when you add the widget into your site, that you have the required Font Family connected via, for example, the <link> HTML tag.
If you want us to handle the font in the widget, then please add the font via a stylesheet URL or upload the custom font files. Adding fonts this way means that the widget will always use the added font, even when it's loaded in a platform like MetaTrader or cTrader.
To add a font via a stylesheet URL, follow this process:
- Click "Add Stylesheet URL"
- Go to Google Fonts and find the stylesheet URL for the desired font. This is an example for Noto Sans: https://fonts.googleapis.com/css2?family=Noto+Sans:ital,wght@0,100..900;1,100..900&display=swap
- Paste the URL into the stylesheet URL field in step 1.
- Click "Validate". At this point we will check if the URL you provided does indeed store the required fonts.
- If the validation is successful, click "Save Font".
The new font is now usable in all your widgets!
Here's a short video of this process:
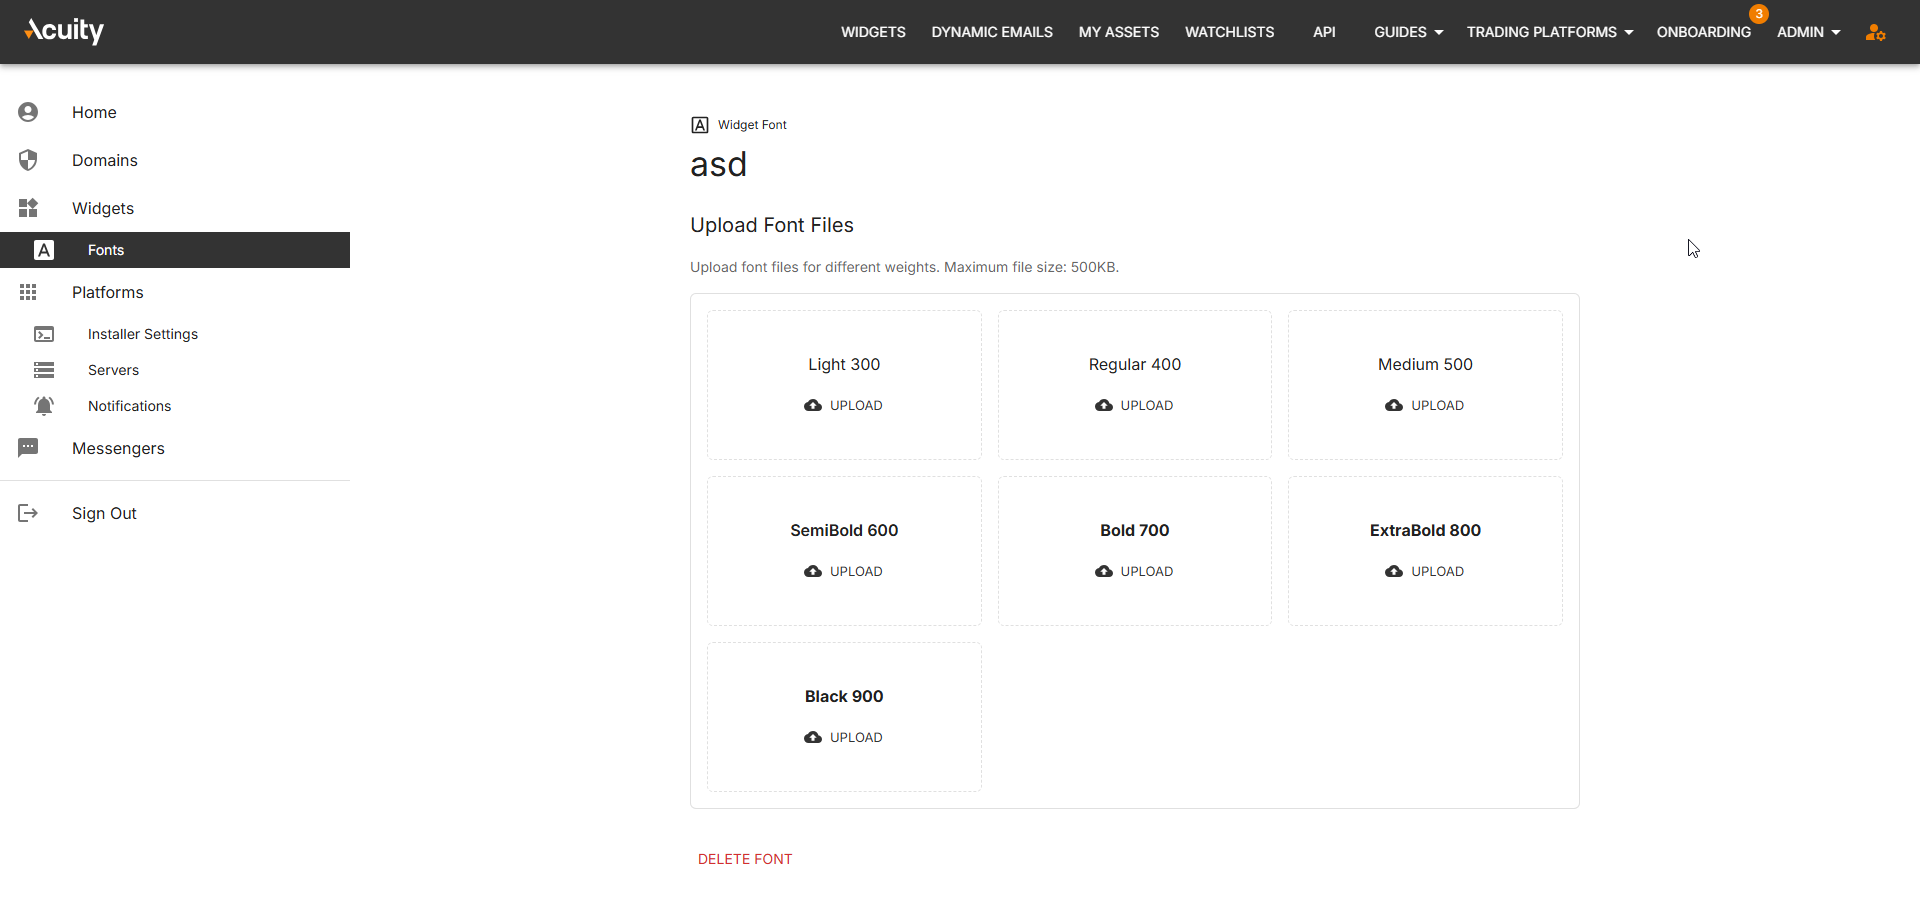
To add a font via a font file upload, click the "Upload Font Files" button when adding fonts. You will be presented with an option to upload a separate file with the required font weight.
The following file formats are supported:
- TTF
- OTF
- WOFF
- WOFF2
Colours
The vast majority of widgets support full customization of the colours of all the components. This will help you align the look & feel of the widget to your brand style, which will make the widget look “native” within your platform or website.
Calls to Action
Widgets can be used for various goals, such as acquisition or engagement, and they support adding CTAs that help achieve these goals.
With CTAs the following can typically be configured
- State: you can choose if you want the CTAs to appear or not
- Look & Feel:you can make it stand out and capture attention immediately
- Action: it can redirect the users to a particular URL, or, in the case of trading platforms, can open a trade ticket.
- The Web CTA supports adding certain placeholders into the URL, so that the users could be redirected to a specific page within your site. We support the following placeholders:
- {assetName} - this is the name of the asset as it appears in your widget.
- {assetTicker} - this is the ticker or the symbol of the asset as it appears in your widget
- {externalId} - if you have added an external identifier to the assets via the asset renaming process, this ID will be passed here
- {languageCode} - this is the widget language code (for example, en-GB).
- {languageCodeNoLocale} - this is the widget language code, but without the locale (for example, en).
- The Web CTA supports adding certain placeholders into the URL, so that the users could be redirected to a specific page within your site. We support the following placeholders:
- Text: the CTA could say “Trade Now”, or “Open an Account”. This value can also be translated into all supported languages.

Watchlist
Usually widgets allow interacting with multiple instruments, and sometimes these instruments may not match with what you are offering in your platforms.
The watchlist setting can be used to avoid showing unoffered instruments.
One setting can contain only one watchlist, but you can create multiple settings to hold different watchlists if you require.
If you don’t have a watchlist set up at the time of configuring a setting, you can create one directly from the settings menu. You’ll see the following note:

Trading Platforms
Many widgets that we offer are also available as plugins or expert advisors for trading platforms like MetaTrader or cTrader.
Default Trading Platform Setting
You can choose the setting that will be visible to your users when they access the widget as an EA or a plugin. The setting that is used for this is called “Use this setting in MetaTrader”.
Disclaimer
Some widgets, like AnalysisIQ and Signal Centre, allow you to add a Disclaimer or a Risk Warning that will be visible to the users when they access the plugin.
These are the settings that are responsible for this:
- Display Warning in MetaTrader EA - this is a flag that turns the disclaimer either on or off.
- Disclaimer Text 1/2/3 - these are the parts of your disclaimer that will be displayed to the users.
This is the result:

If the user clicks “I decline” the plugin or the EA will be closed.
Using a customised widget
Once you modify the widget settings, name your setting and save it, you will be able to start integrating it in your website pages or apps.

Here is what you can do on this page:
- Quickly switch between permitted languages
- Quickly switch between created settings
- Create another setting
- See how this widget setting will look on mobile, tablet, and desktop devices
- View the integration code
- Open the widget in a new tab
Opening the widget in a new tab (step 6) is perfect if you want to share this widget style to get approval for the style or get additional feedback.
View the integration code
This component is pretty important as it will enable you to retrieve the HTML that you will be able to add into your website pages or apps.

Clicking the “Show Code” button will open a modal window that will contain three tabs:
- Widget Code: this tab contains the full HTML that you can integrate into your platform and it captures the previously saved settings using the settingId parameter, your unique API Key, and the language you selected on the previous page.
- Additional Information: this tab contains details about the events and raw JavaScript settings that this widget supports. These values map to the settings that you configure in the settings editor.
- Usage: this tab contains some additional information and guidelines about using this widget.
NOTE: Iframe widgets (that have an IFRAME badge on them), upon clicking the Show Code button, will show the <iframe> HTML element with the widget URL in the src attribute that you will be able to add into your webpage or app.
Using SettingId vs raw JavaScript settings
The settingId is stored on our servers after it’s saved, so it allows you to modify settings in the dashboard and they will apply to the widgets without having to redeploy the page where the widget is hosted.
On the other hand, using raw JavaScript settings can provide you with greater flexibility with regards to modifying widget settings depending on some conditions on your website.
For example, without having to maintain two separate setting IDs for Light and Dark themes, you can modify the underlying widget settings depending on the selected theme.
Also, the raw JavaScript settings will override the setting that is tied to the settingId. For example, consider this widget snippet:

This configuration will tell the widget to use the Roboto font family even if another value is defined in the settingId.
What to do if a setting you need can’t be customised
If you see that a particular setting cannot be customised, you can try using CSS overrides to modify these elements.
You can find the required element using the Inspect Element functionality in the browser. The HTML classes that we use for elements are dynamically generated on every build, for example <div class="AcuityAnalysisIQ__controlsWrapper__XXPza">
Because of that, if you’d like to override CSS, you’ll need to use matching selectors, for example:
